Weekley

Weekley

A novel physical & interactive weekly planner

Basic project info

Weekley is an interactive physical prototype that helps users reflect on their time management skills and rewards them through playful interactions for finishing tasks on time. It's an Arduino-based device which I developed to learn basic electronics and to get proficient in digital fabrication methods.

My role Product Designer
Platform Arduino, Interactive physical device
Industry Personal development, Time management
Period Feb 2017 – Mar 2017
Contract Academic assignment

Background

This project took place over a period of two months as part of the Physical Computing & Prototyping module that I completed as part of the Human-Computer Interaction (HCI) Master’s program at University College London.

UCL Interaction Centre that delivers the HCI program is a world leading Centre of Excellence in Human-Computer Interaction.

The Challenge

In the Physical computing & prototyping module, we studied how to use Arduino and compatible sensors and actuators. We also learnt to 3D print, 3D scan and laser cut.

A term-long project was designed to test our knowledge and skills. Its main criteria were to:

  • design a novel interactive physical user interface prototype using methods of physical computing and digital fabrication
  • address a concrete problem
  • apply knowledge of the techniques for building interactive prototypes with sensors and actuators, programming micro controllers, and digital fabrication

My Role

This was an individual project – I designed, programmed and developed the whole device.

Target Audience

Weekley was a bit of an exception to the rule as this project was more self-centric – I developed it to serve my needs primarily. This was because the main aim of the Physical Computing & Prototyping module was learning how to use electronics and digital fabrication and I had an idea for a new personal organiser in mind for quite some time.

That does not mean, however, that I would not test it and evaluate it – I describe the process below.

Process, methods & tools

Process & Methods

I wanted to learn as much as possible, so I set myself a goal to design a device that would use a lot of different components and would challenge me to go beyond my comfort zone.

I followed Houde and Hills’ 3-dimensional model of prototyping. I first explored and evaluated the role of the device and then continued with implementation and look & feel prototypes in parallel – these were then integrated into a fully designed and functional device.
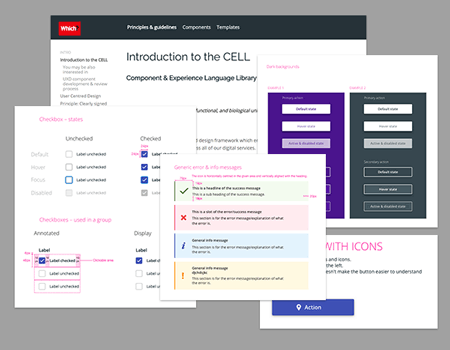
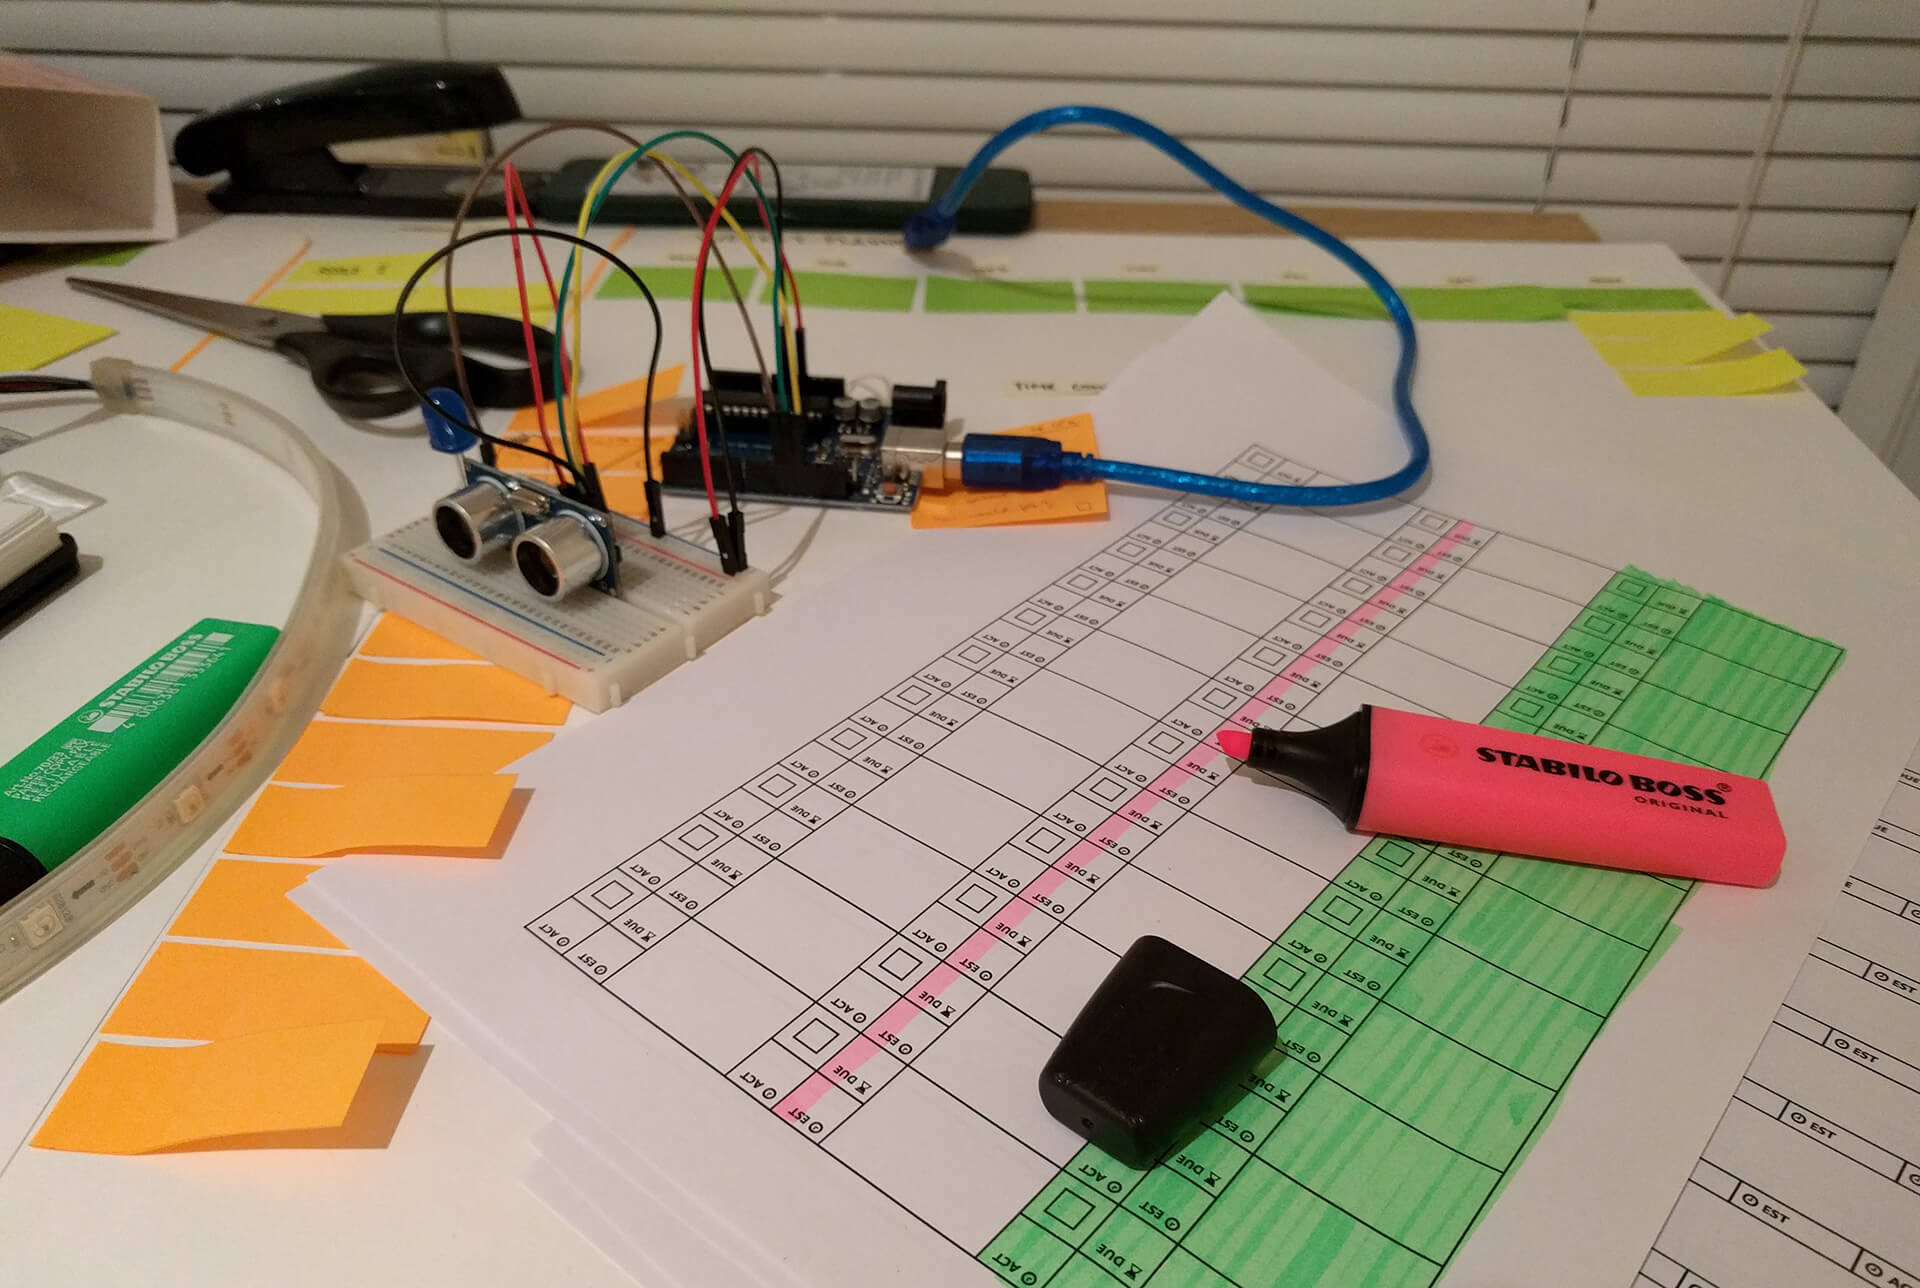
'Role' Prototyping

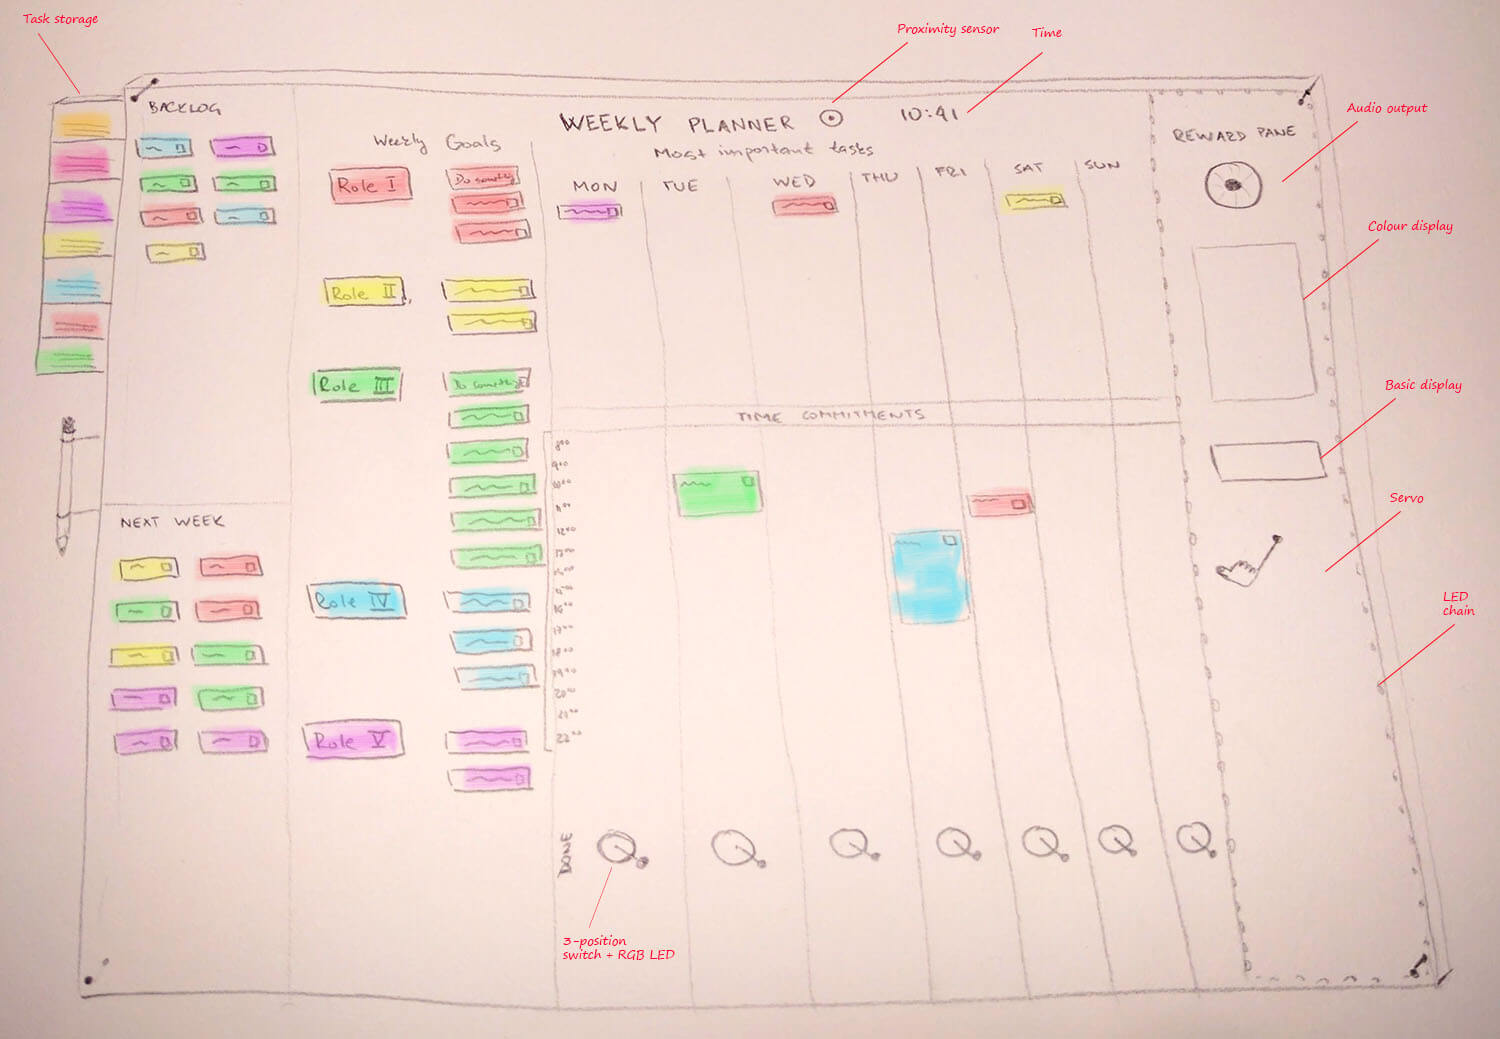
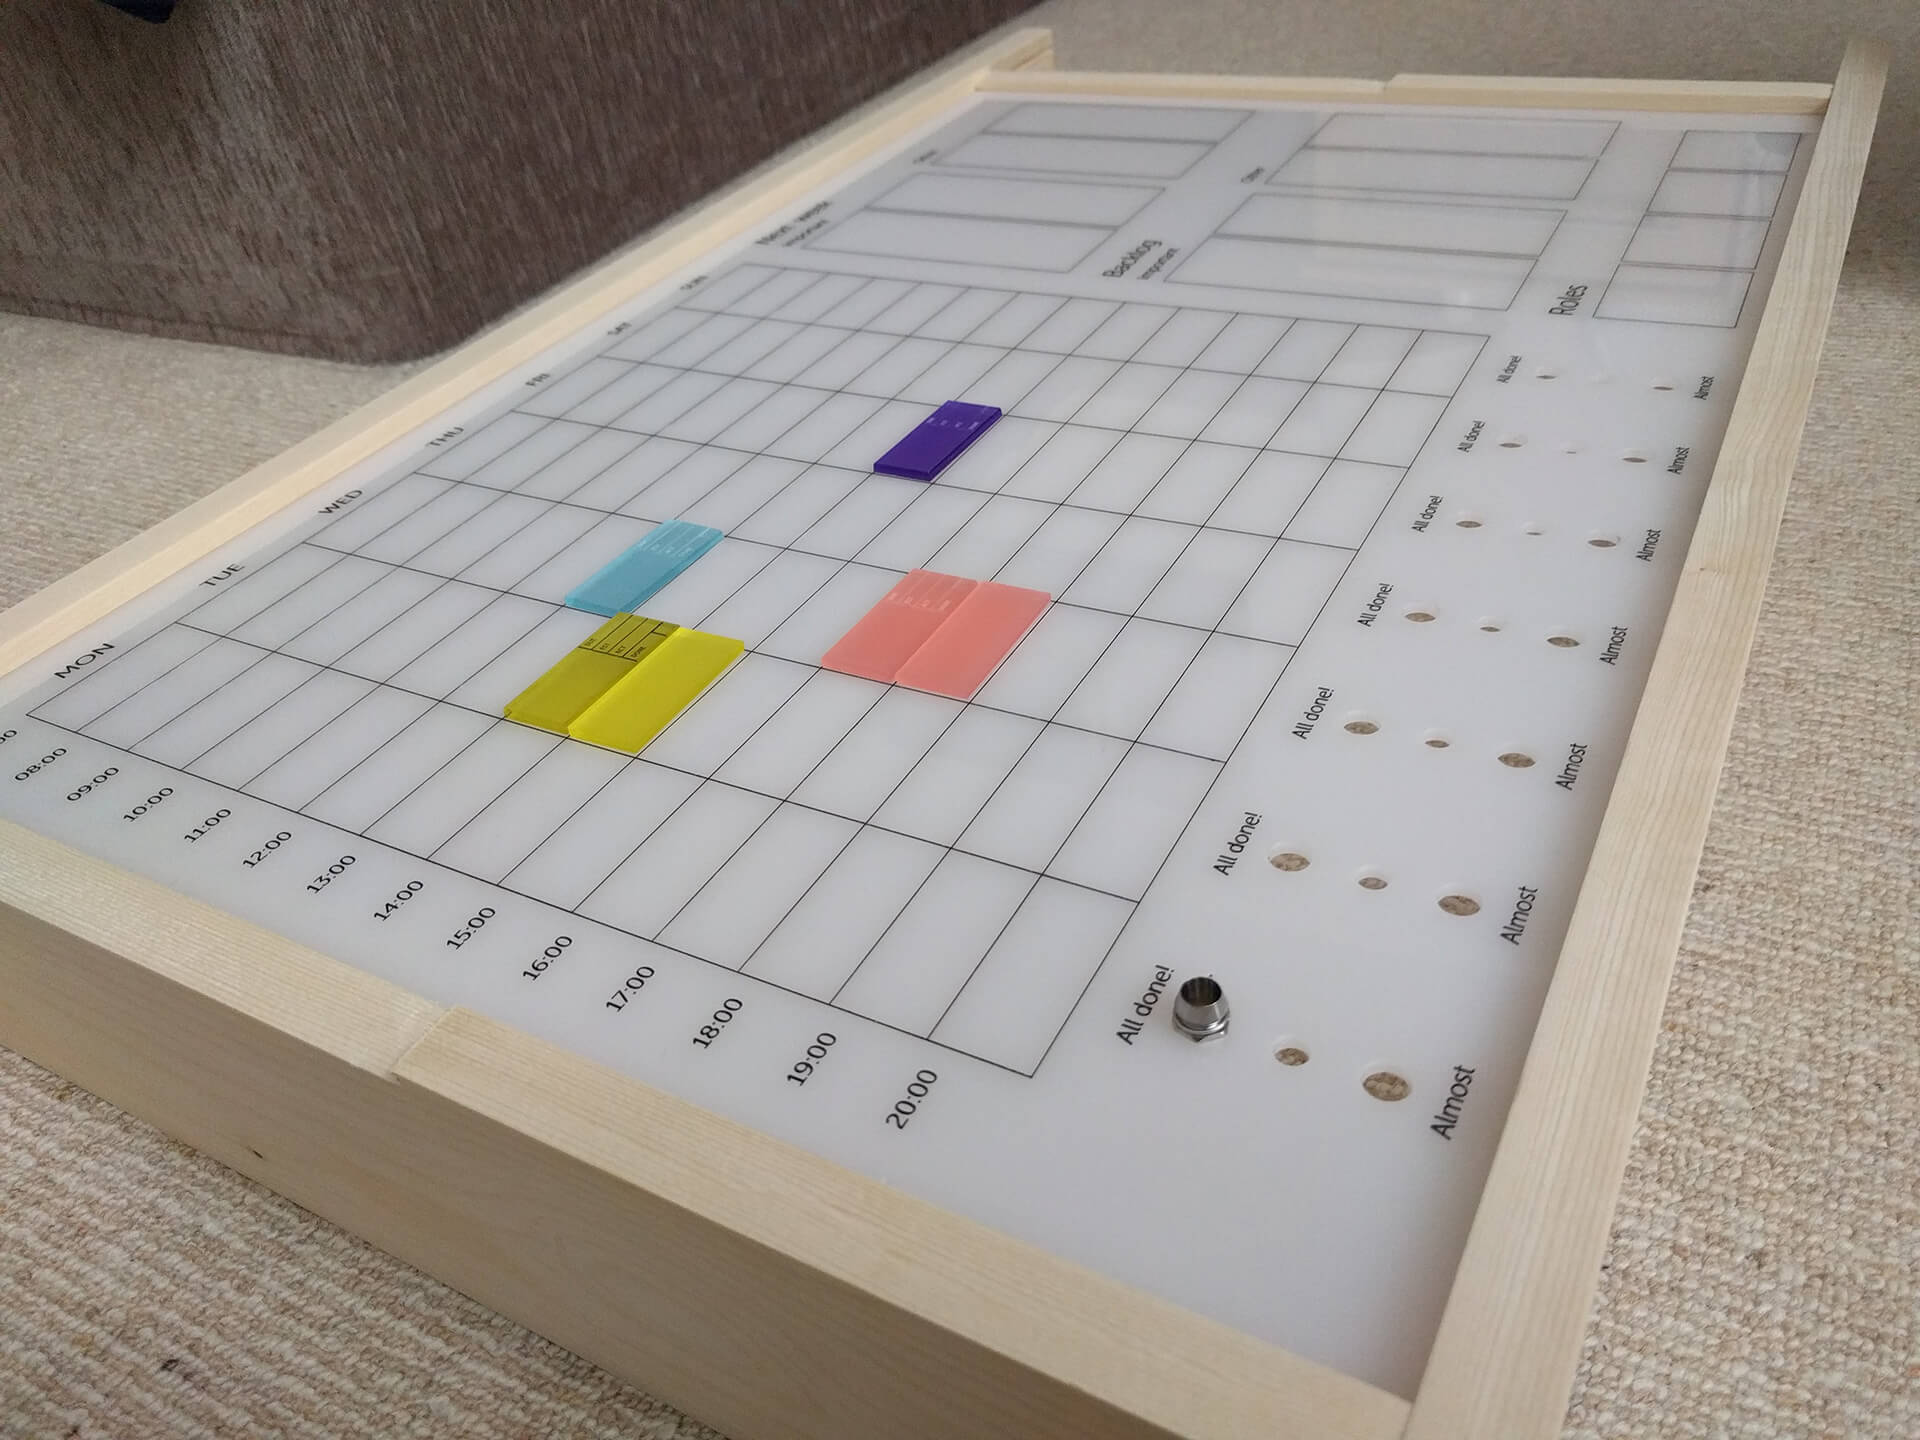
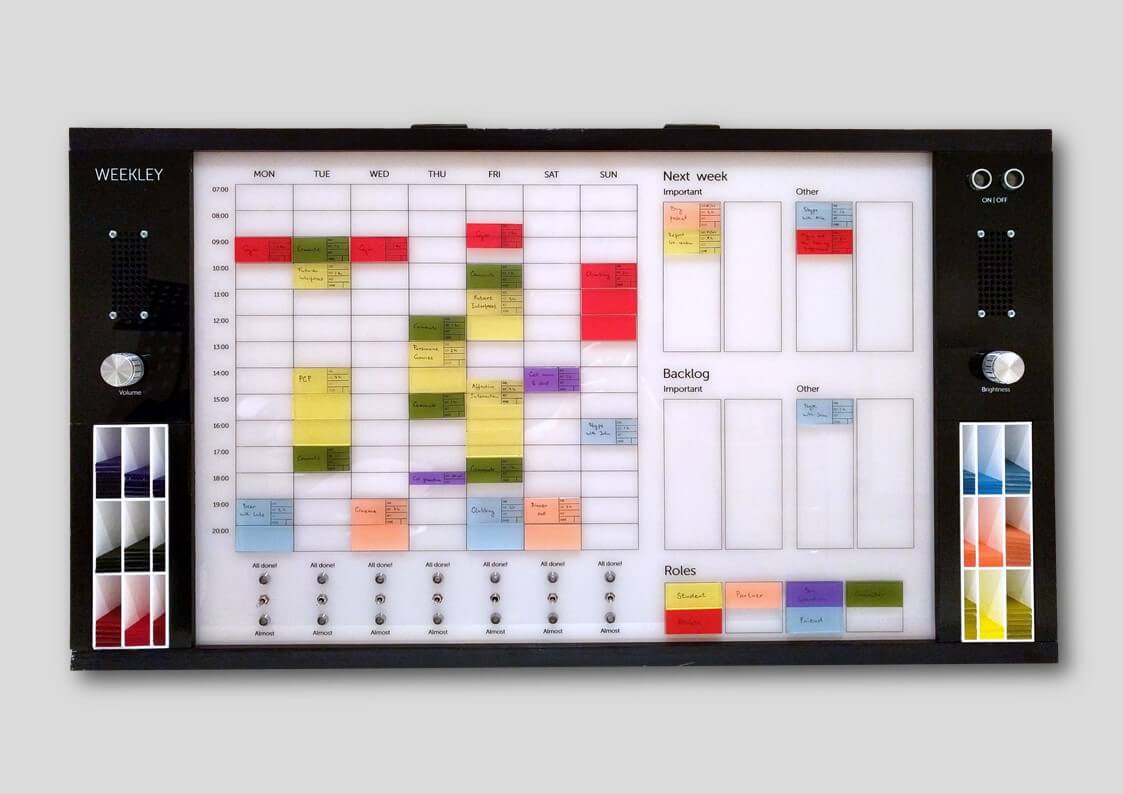
Role prototyping explores how an artefact fits into its user’s life and the environment. The goal of this phase was to evaluate how a tangible planner could be used on a daily basis.

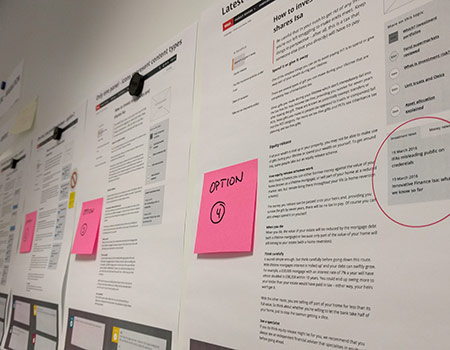
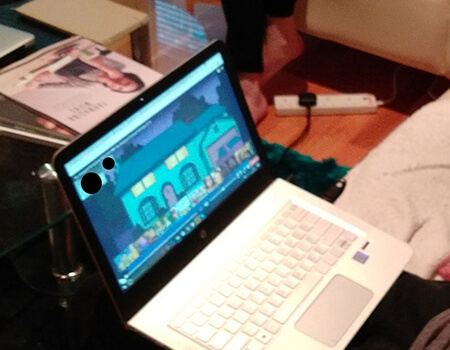
I went through several rounds of paper-prototyping and used Adobe Illustrator to explore layout options.

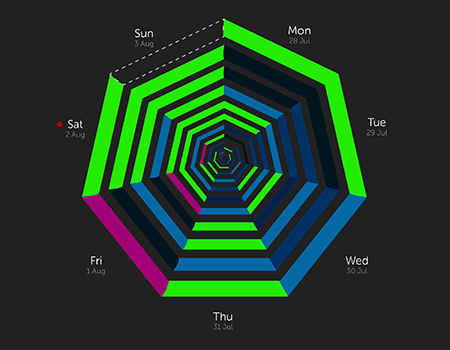
I used the autoethnography method for a week to validate the layout and to understand how I would use the device on a daily basis.

First sketch of WeekleyDeveloping a paper prototypeWeekley - Paper prototype

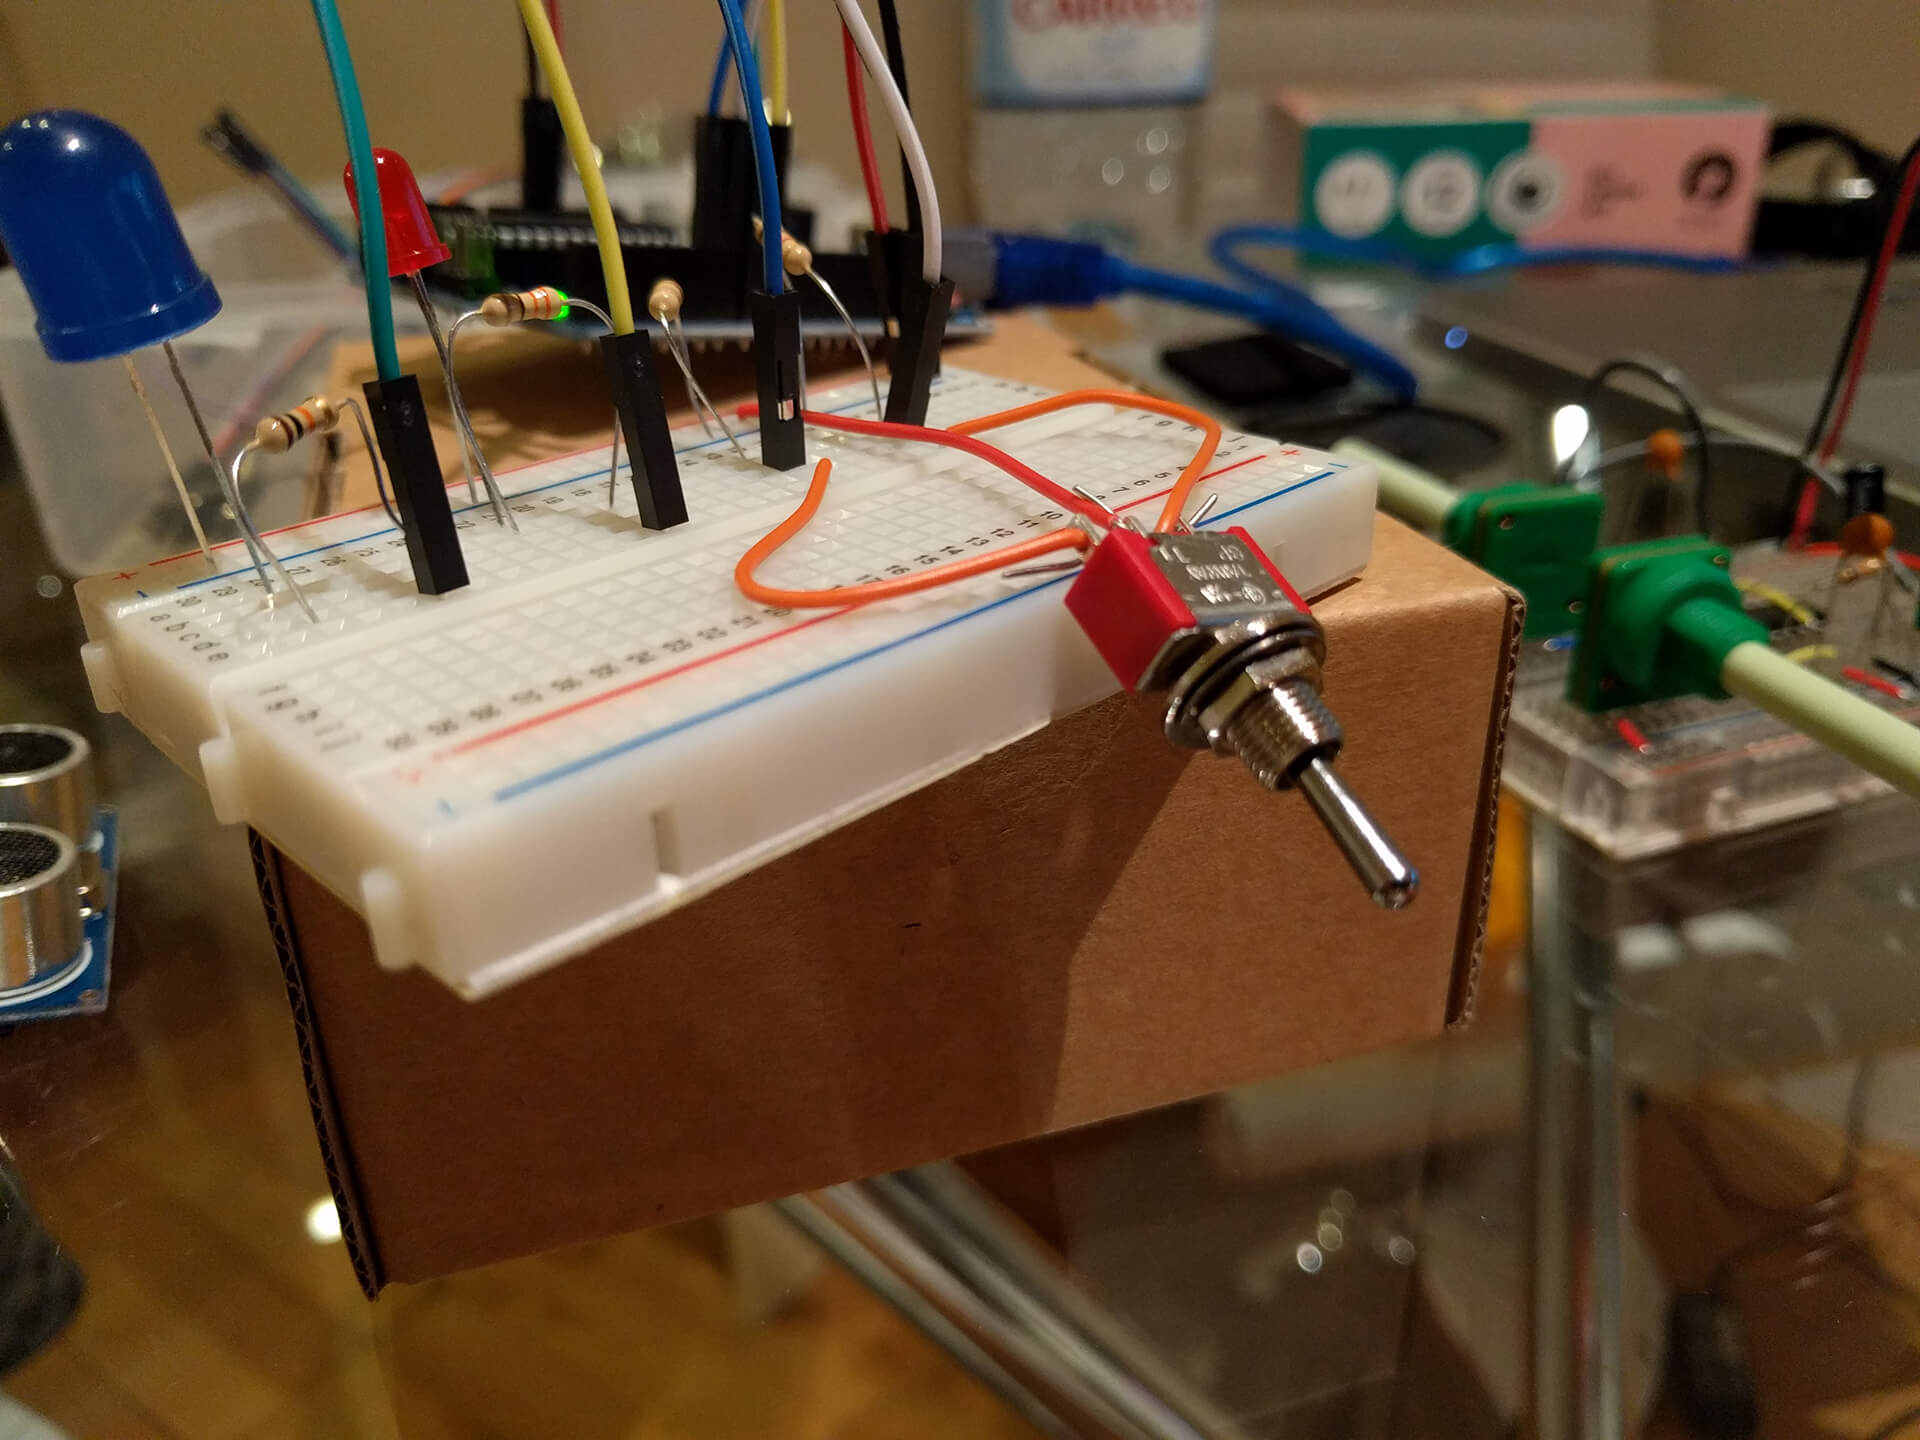
'Implementation' Prototyping

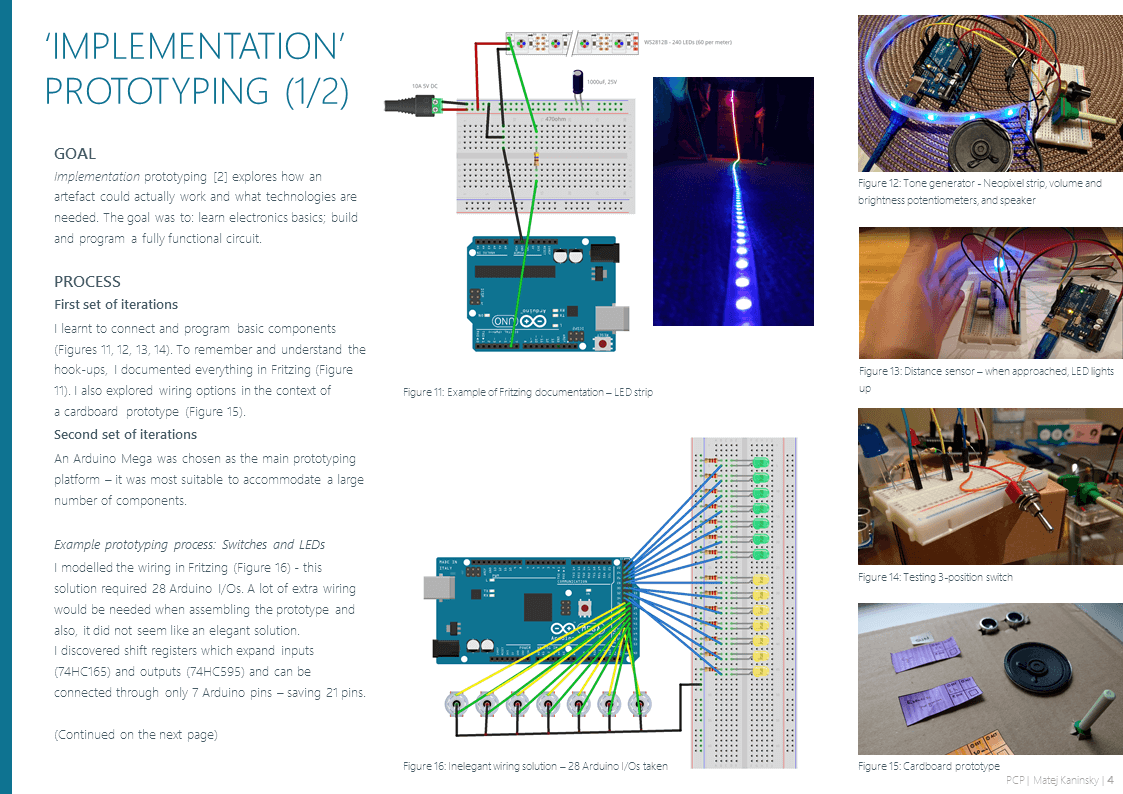
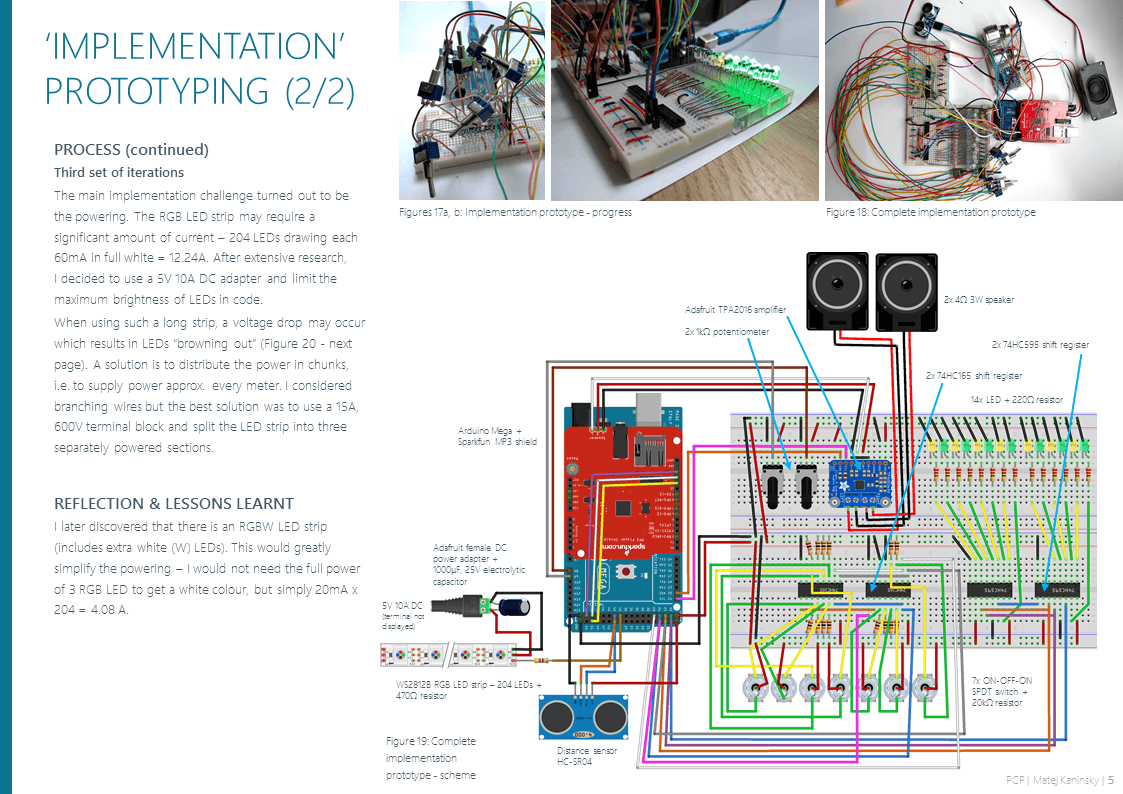
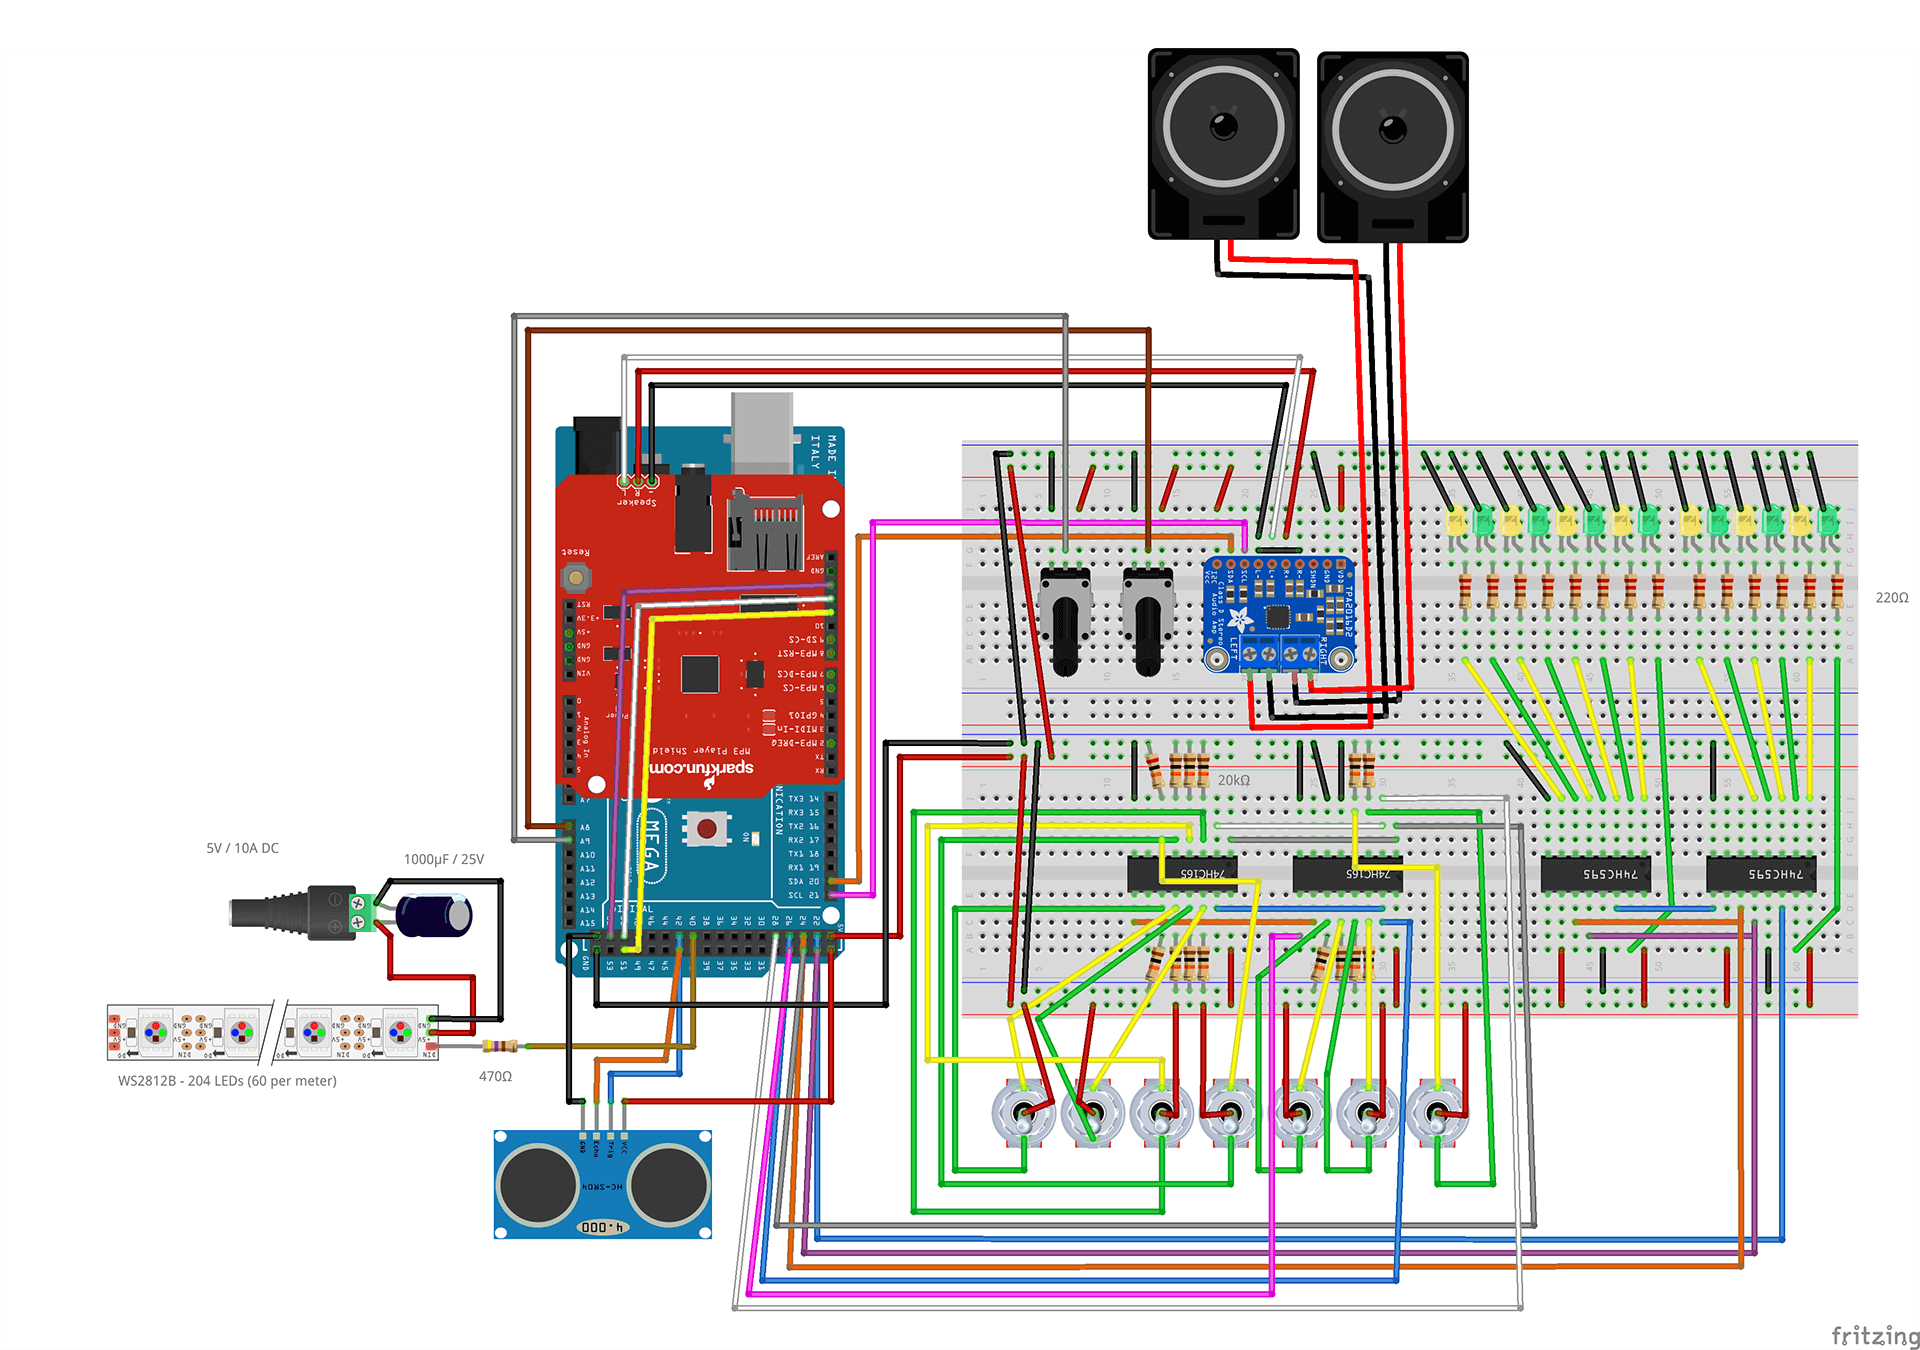
Implementation prototyping explores how an artefact could actually work and what technologies are needed. The goal was to: learn electronics basics; build and program a fully functional circuit.

I first read a few books about electronics and Arduino and then learnt to connect and program basic electronic components. Then I moved to more advanced circuits and finally to designing and developing a circuit for Weekley.

Learning to connect basic circuitsLearning to solderWeekley - Implementation PrototypeWeekley - Circuit diagram

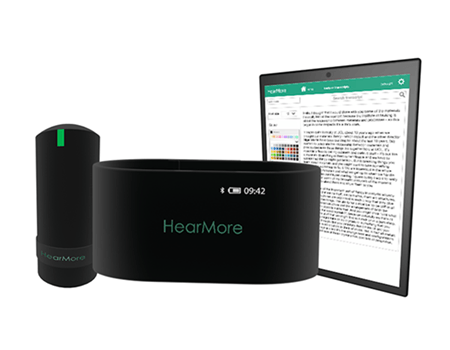
'Look & Feel' Prototyping

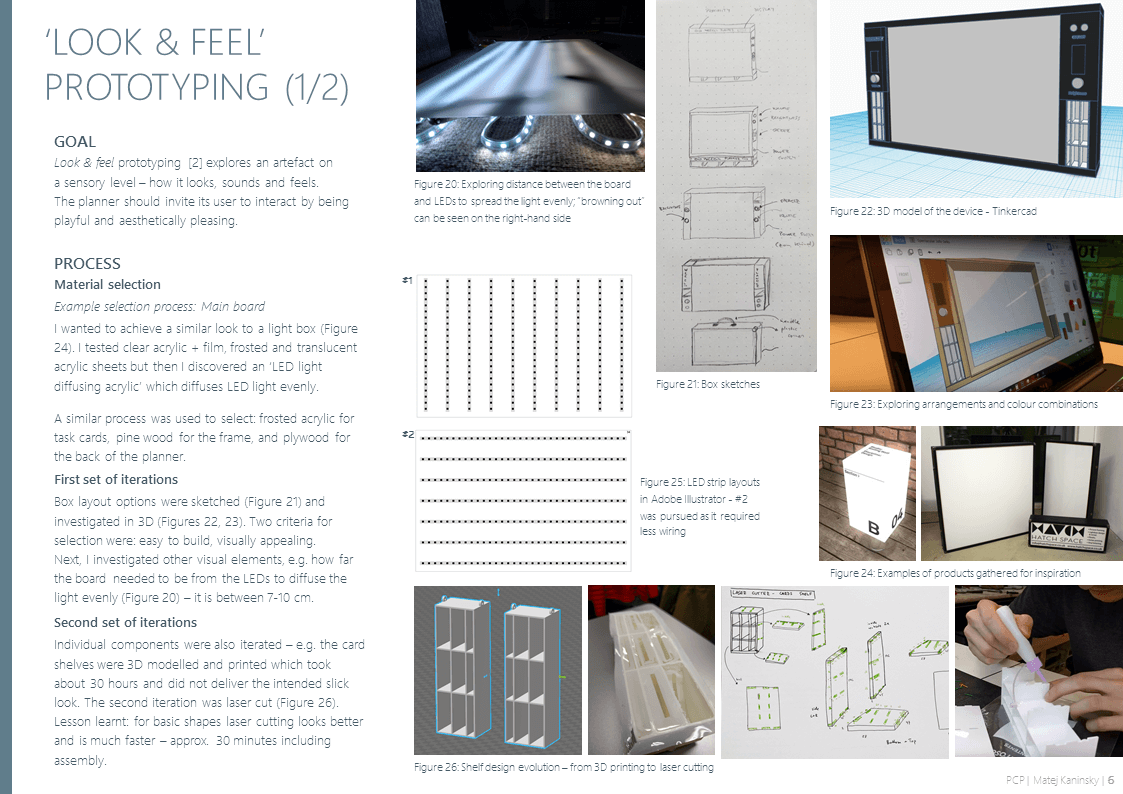
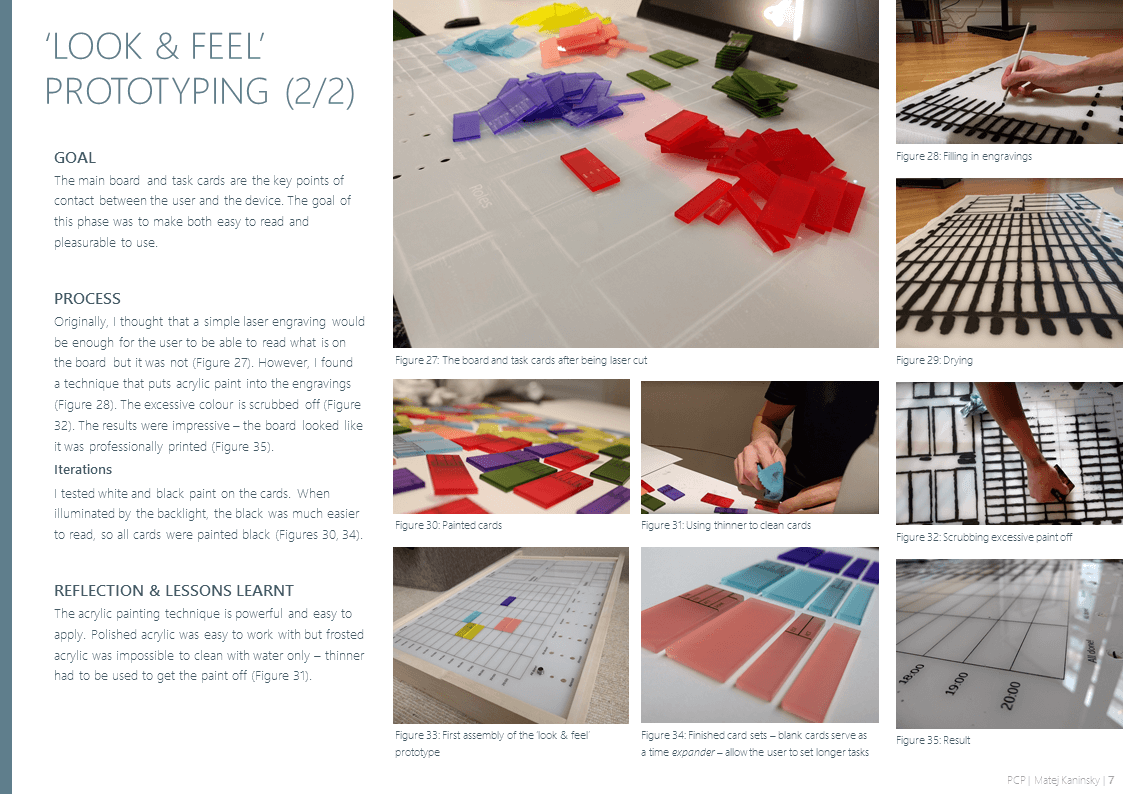
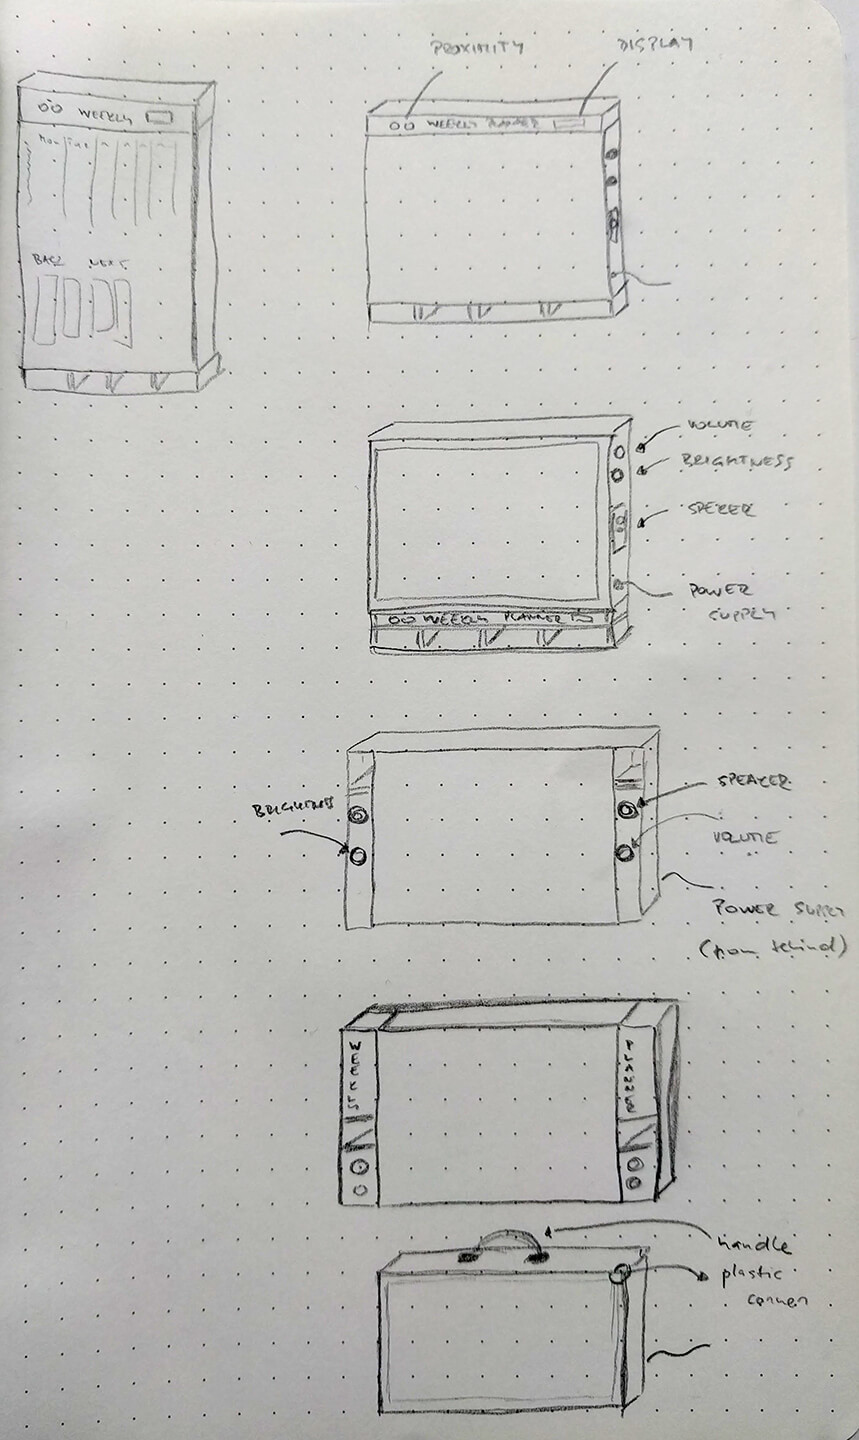
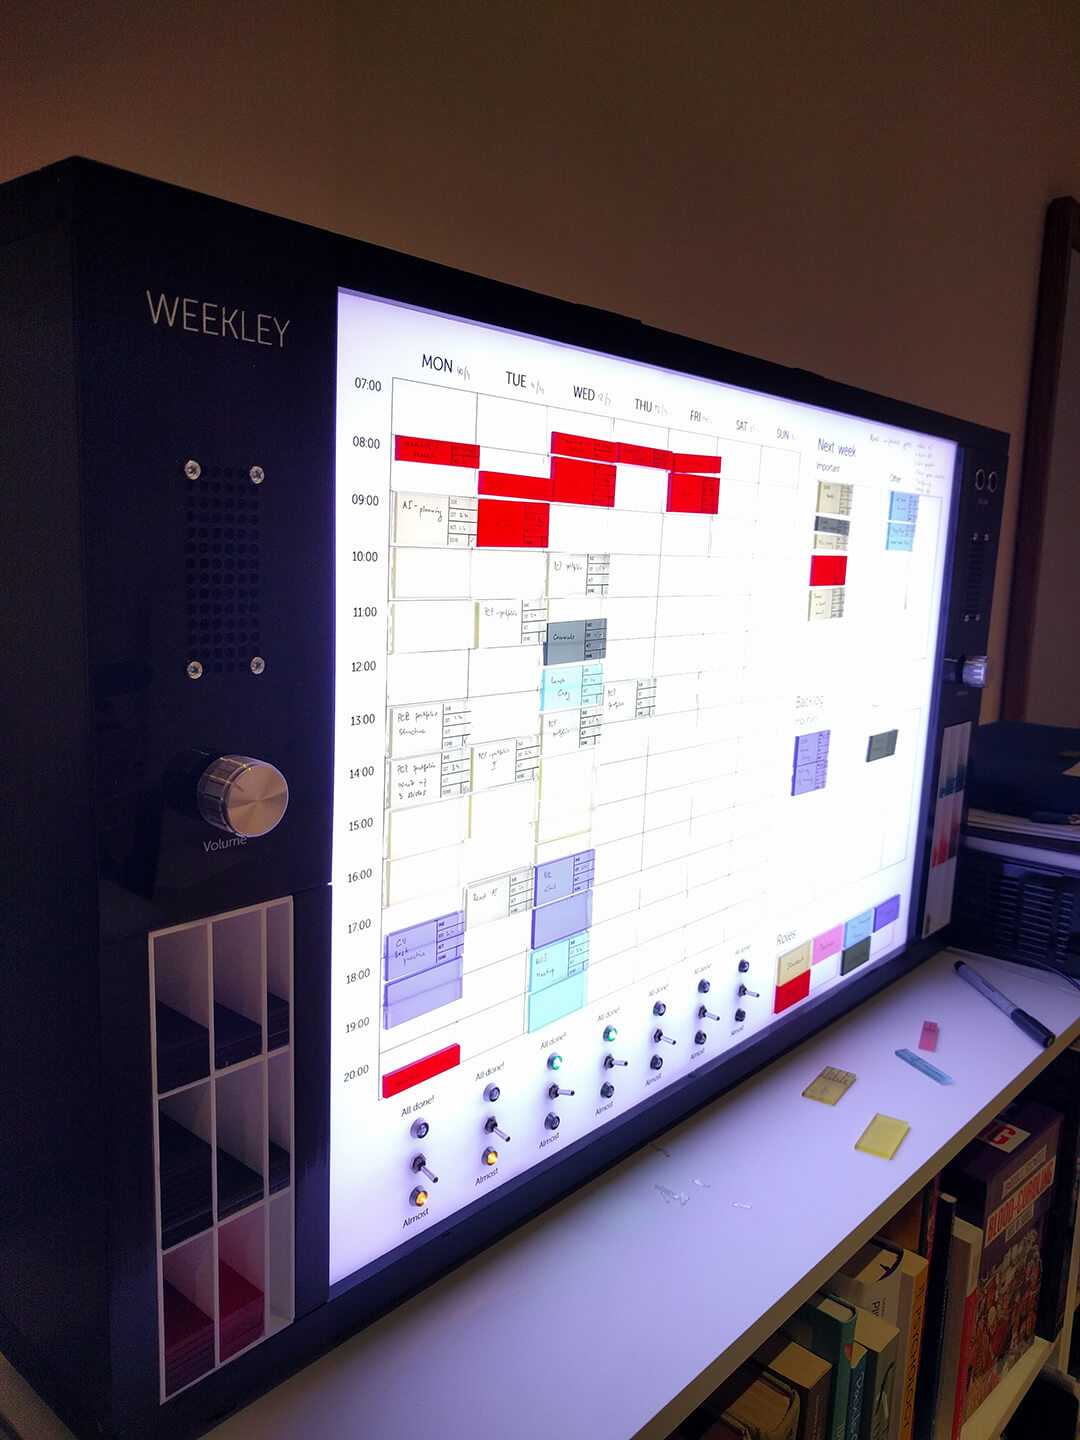
Look & feel prototyping explores an artefact on a sensory level – how it looks, sounds and feels. The planner should invite its user to interact by being playful and aesthetically pleasing.

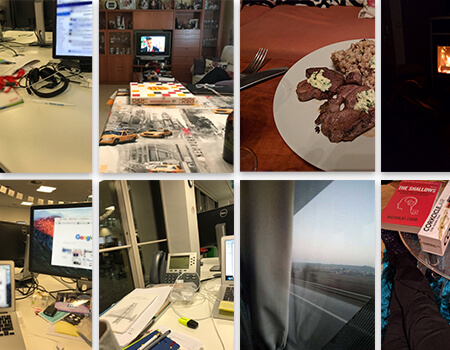
I created an inspiration library of products to help me direct the look of Weekley. I sketched, considered various materials that I could use and tested some of them, and then I made the outer box of the device.

Weekley - Box sketchesWeekley - 3D modelLaser cut task cardsDeveloping the front boardWeekley - Look & Feel PrototypeTesting LEDsSketching task card shelves

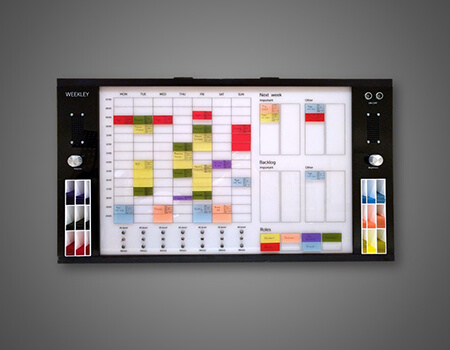
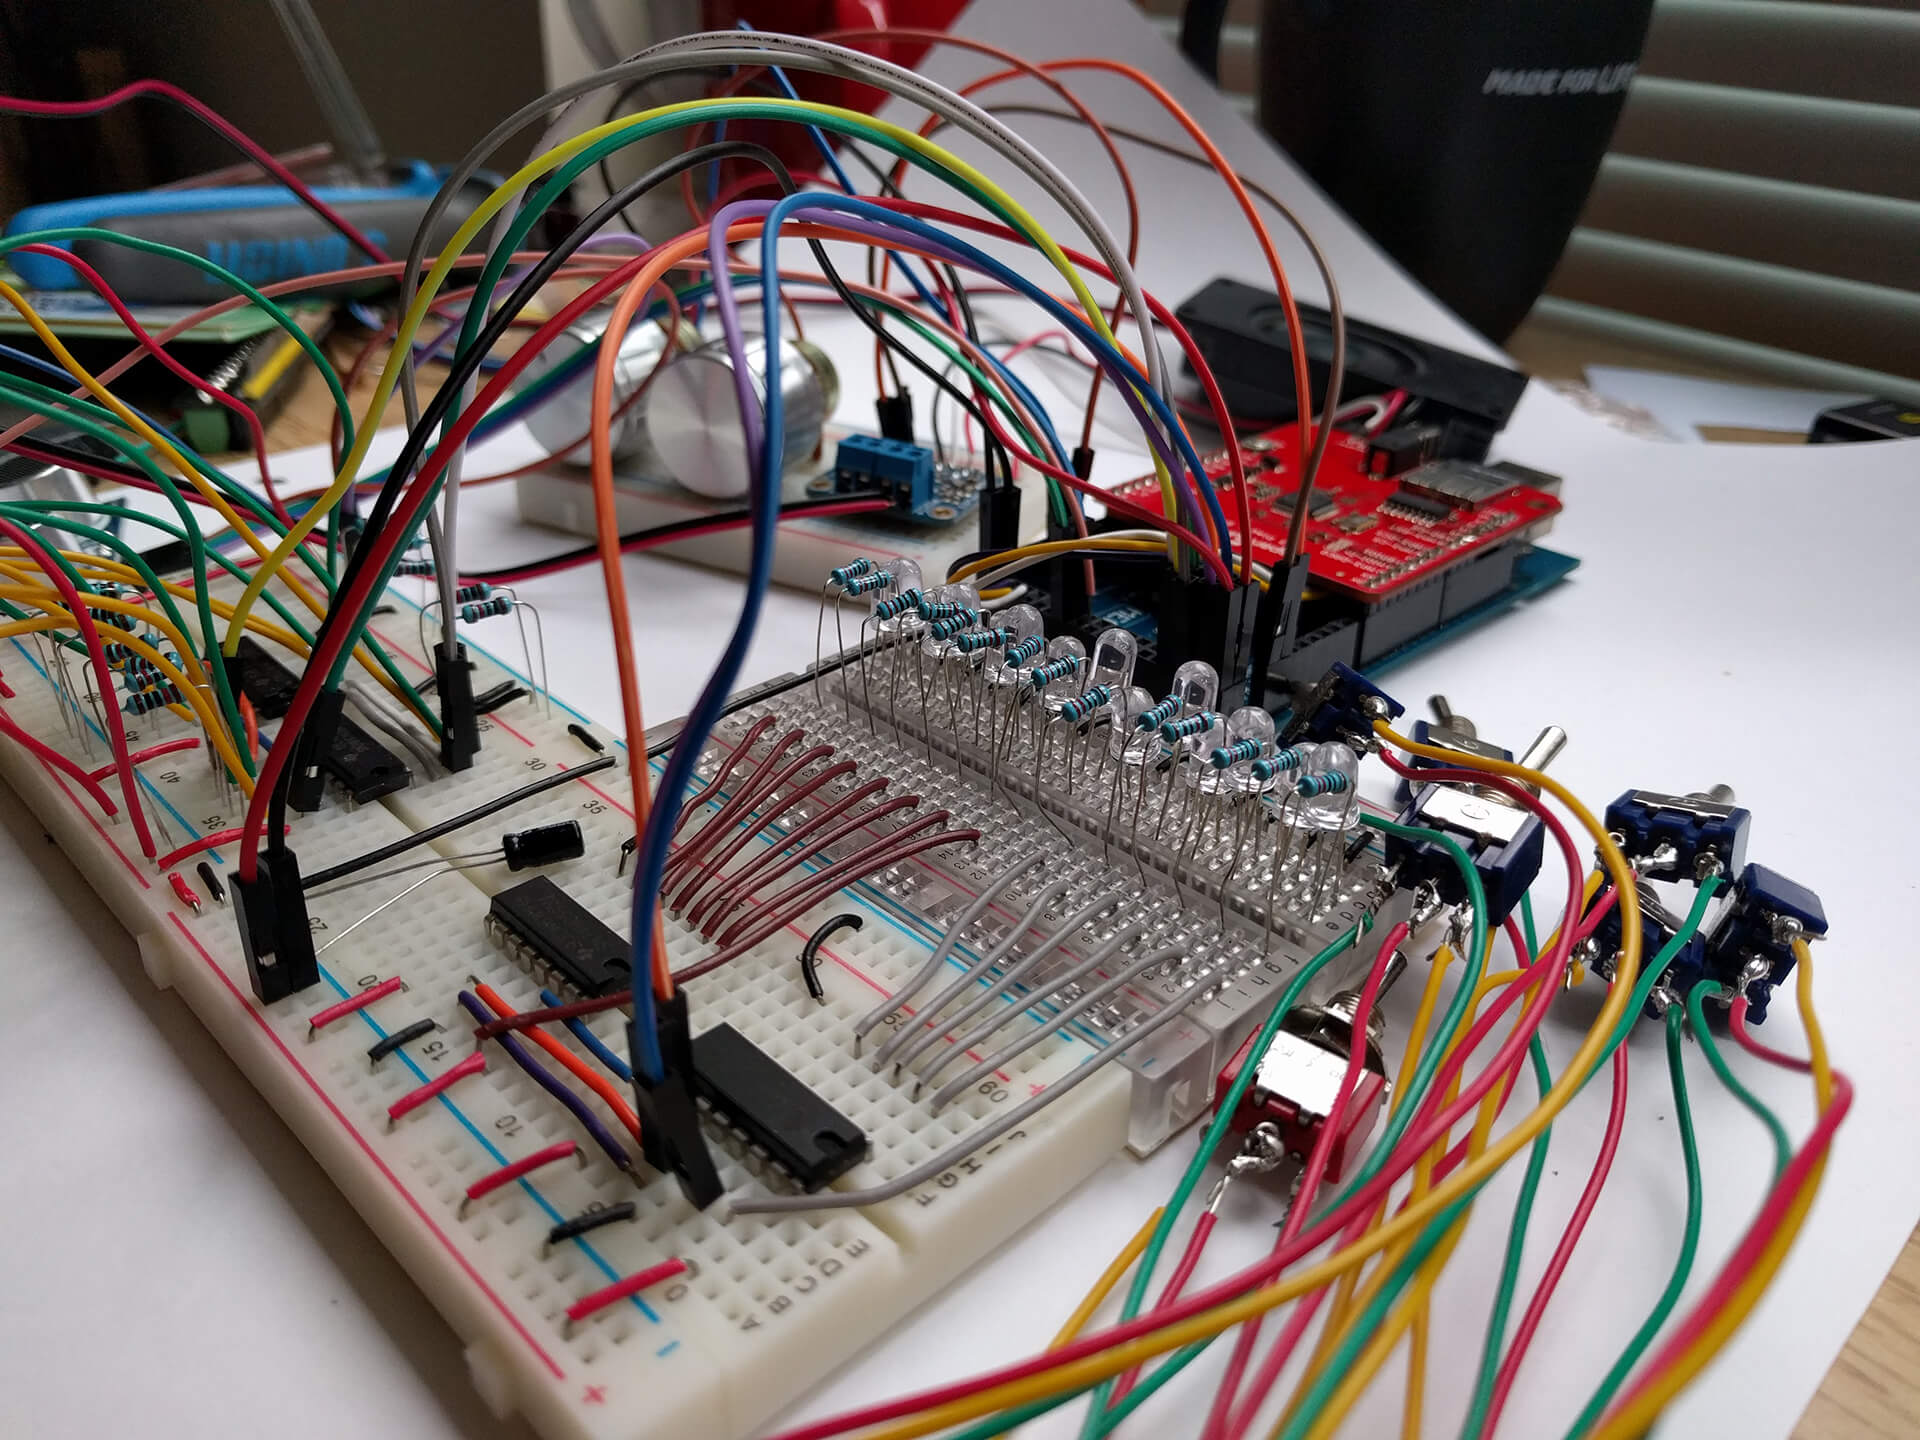
'Integration' Prototyping

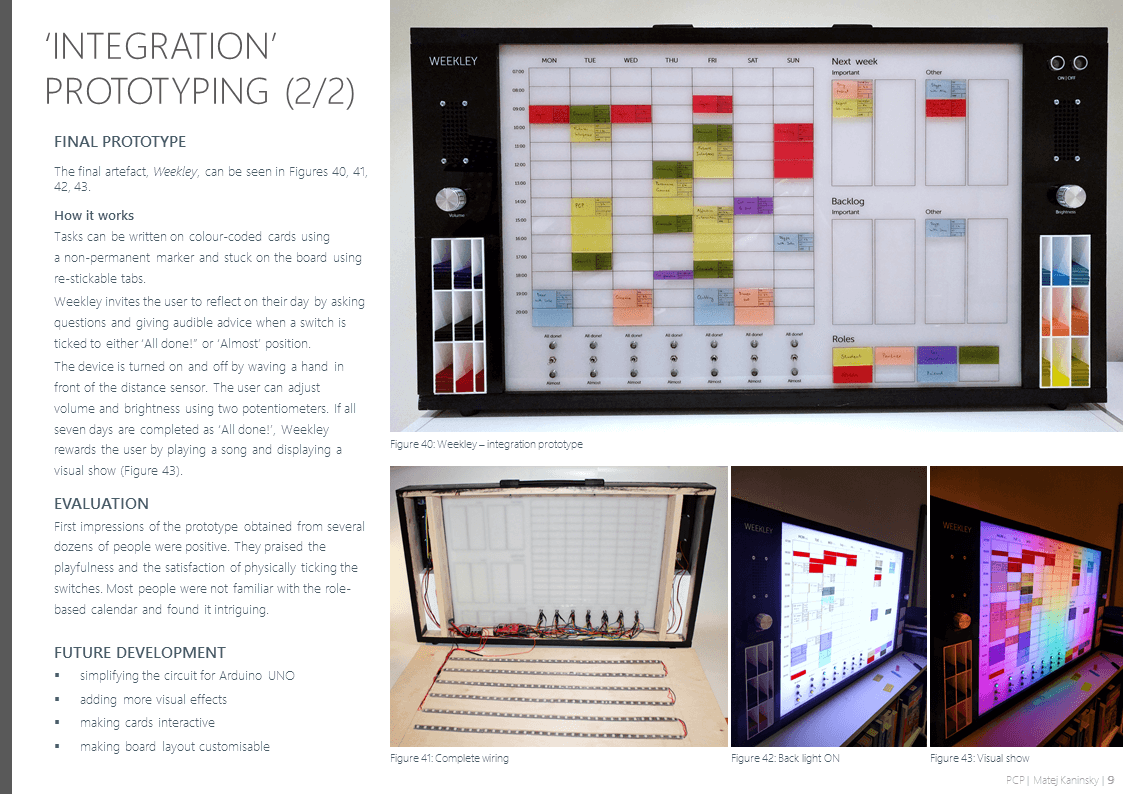
Integration prototyping aims to balance the questions of all three prototyping dimensions above. This prototype represented the complete user experience and was a close approximation to a final product design.

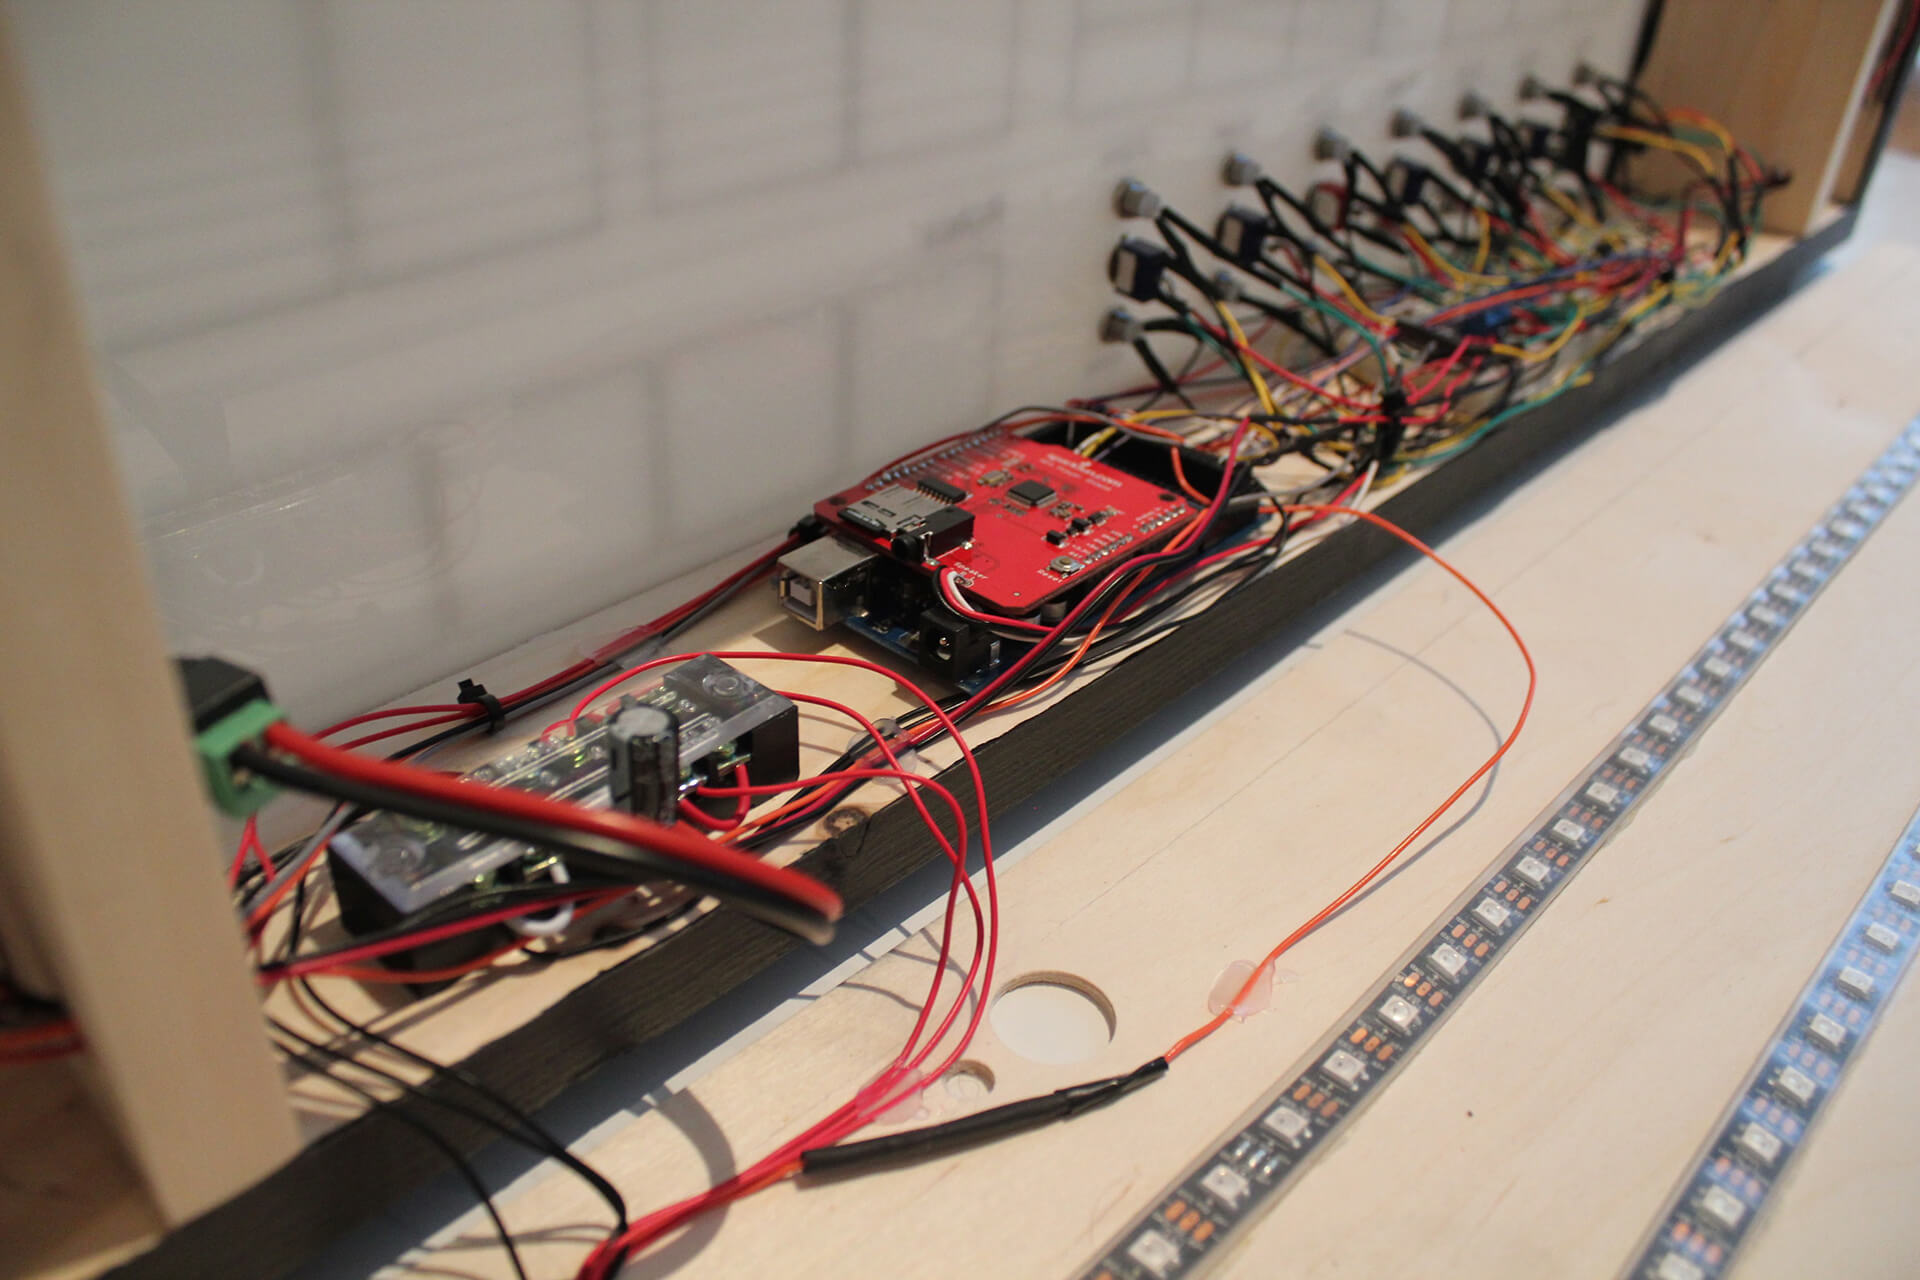
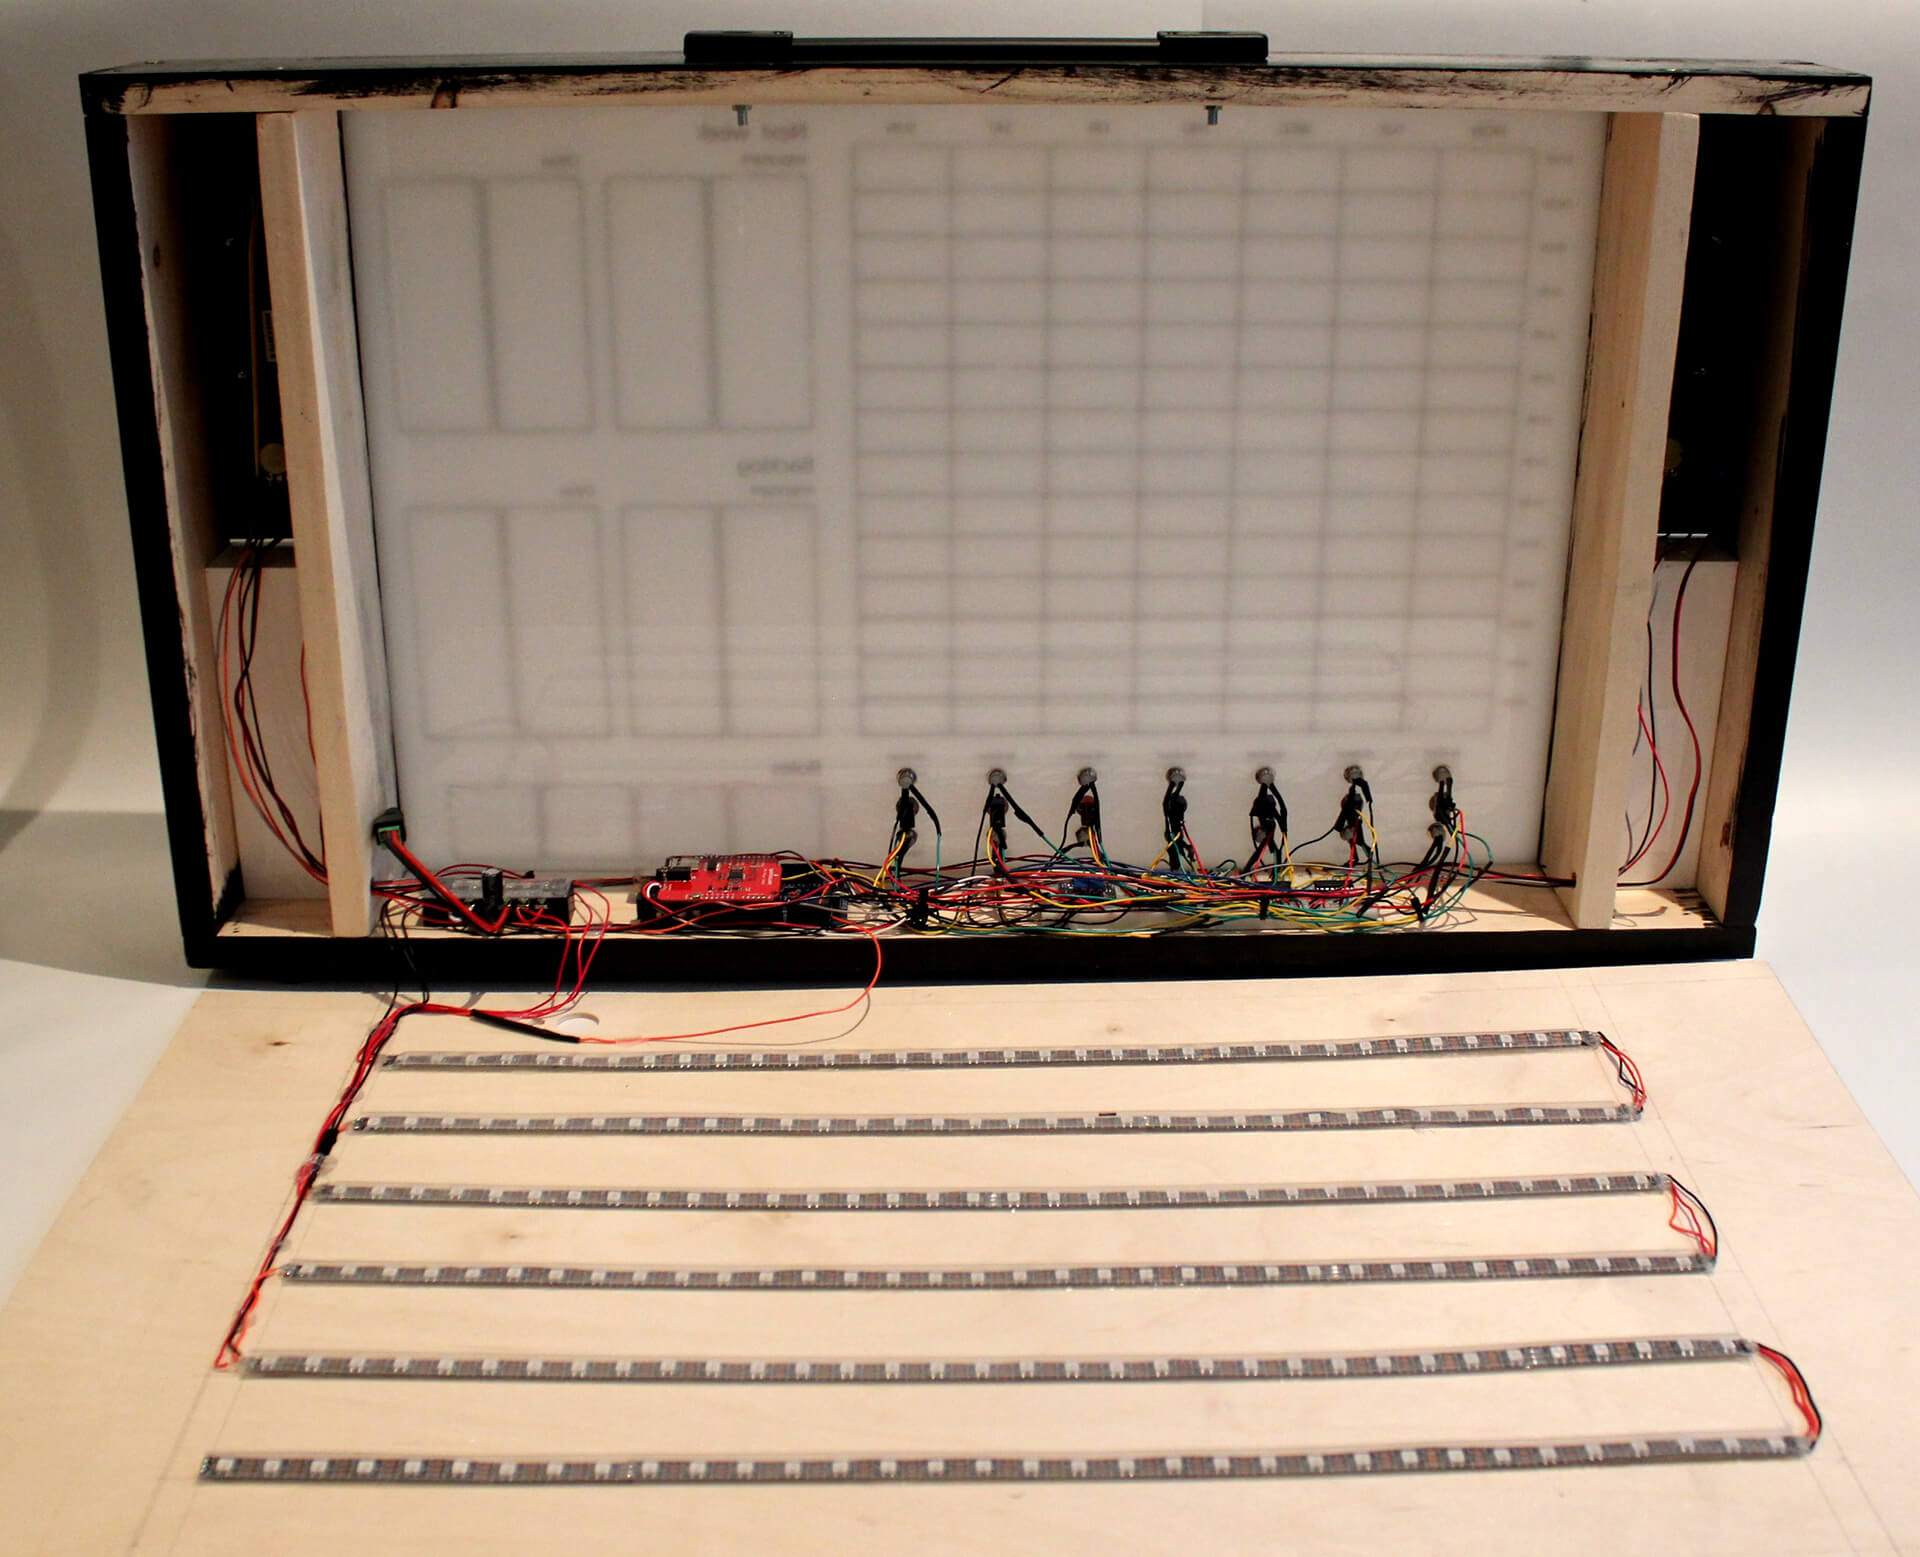
In this phase, I assembled and wired everything together.

Finished wiringFinished wiringFinished wiringWeekley - BacklitWeekley - Reward - Visual Show

Tools I used

Design

  • Pencil and paper
  • Adobe Illustrator
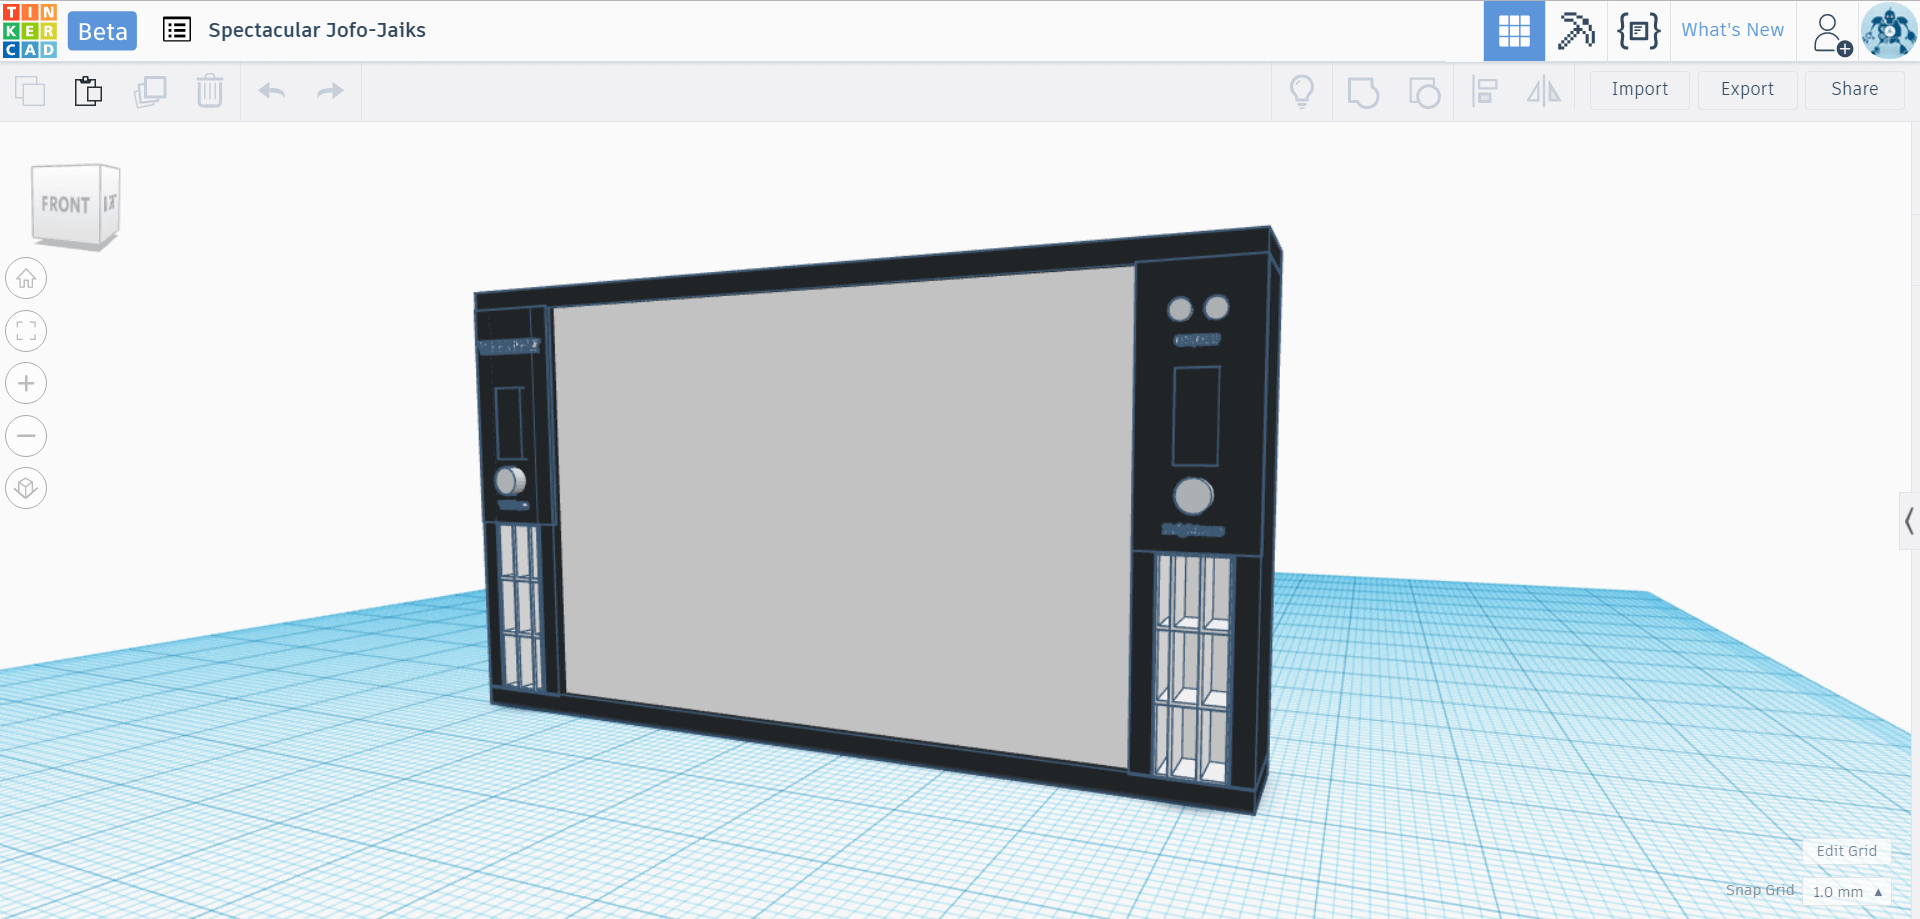
  • Tinkercad (3D modelling)
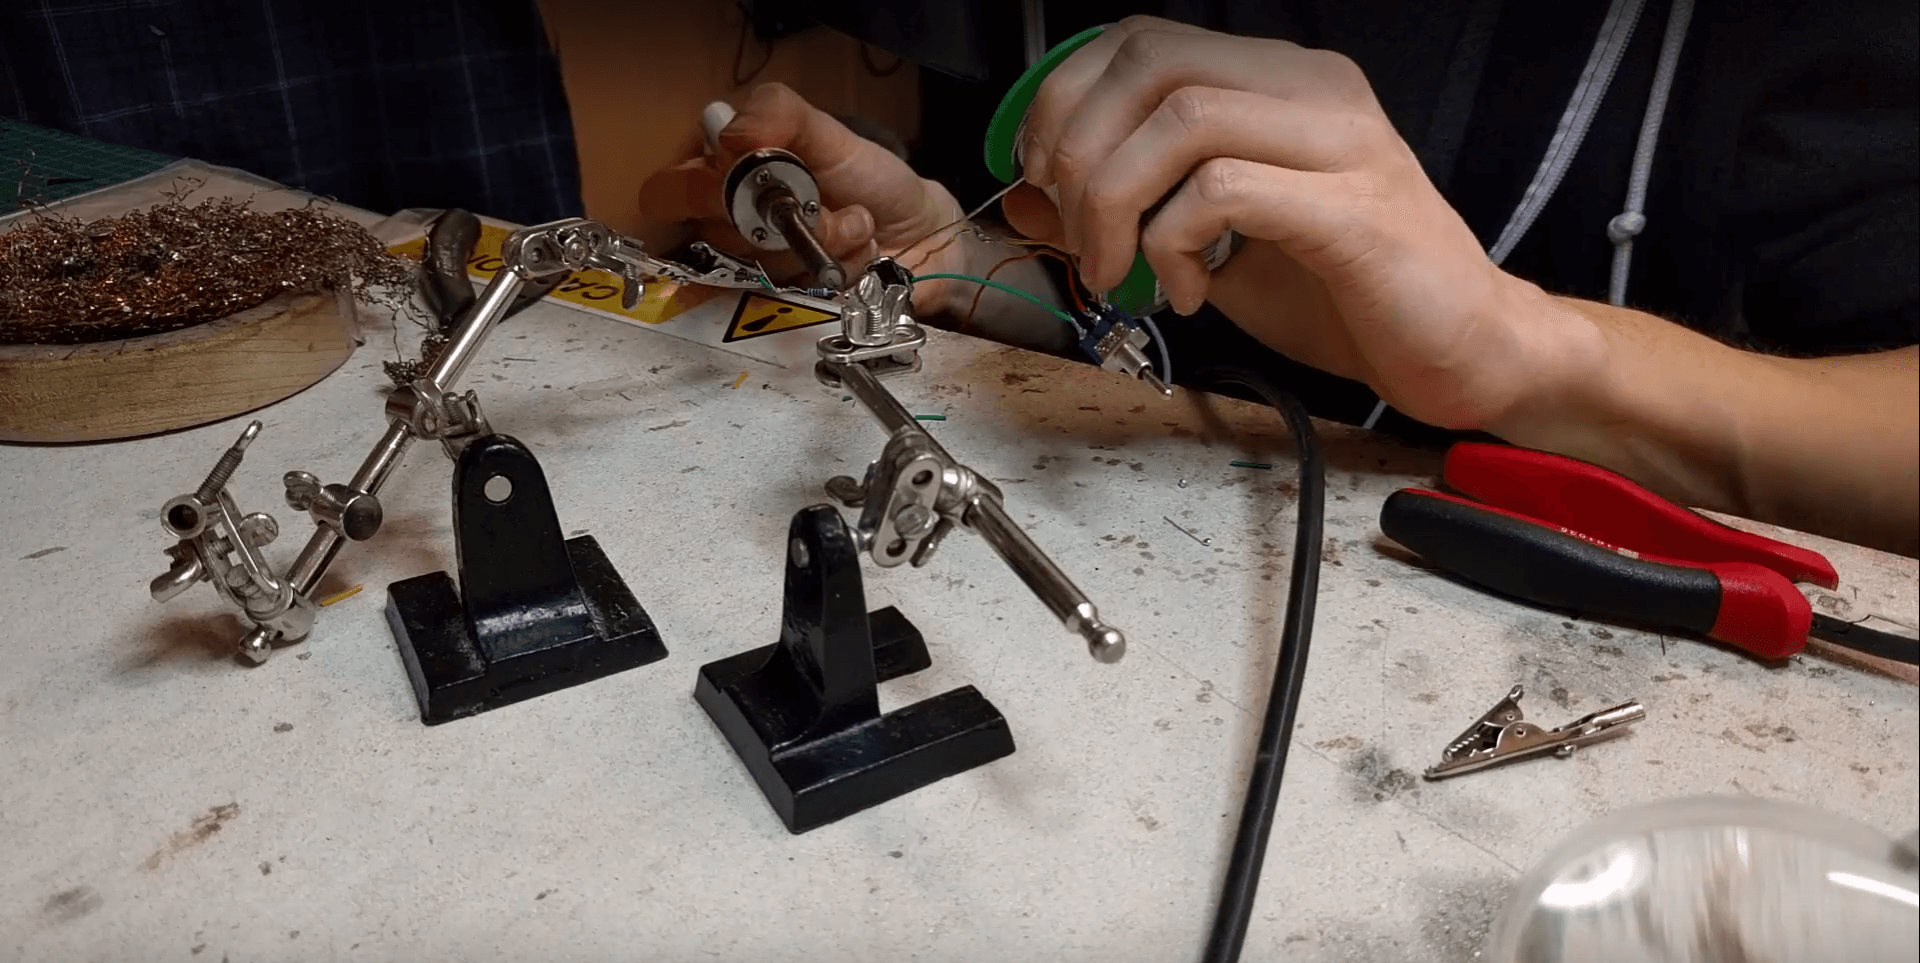
Development

  • Arduino + sensors & actuators
  • Laser cutting
  • 3D printing
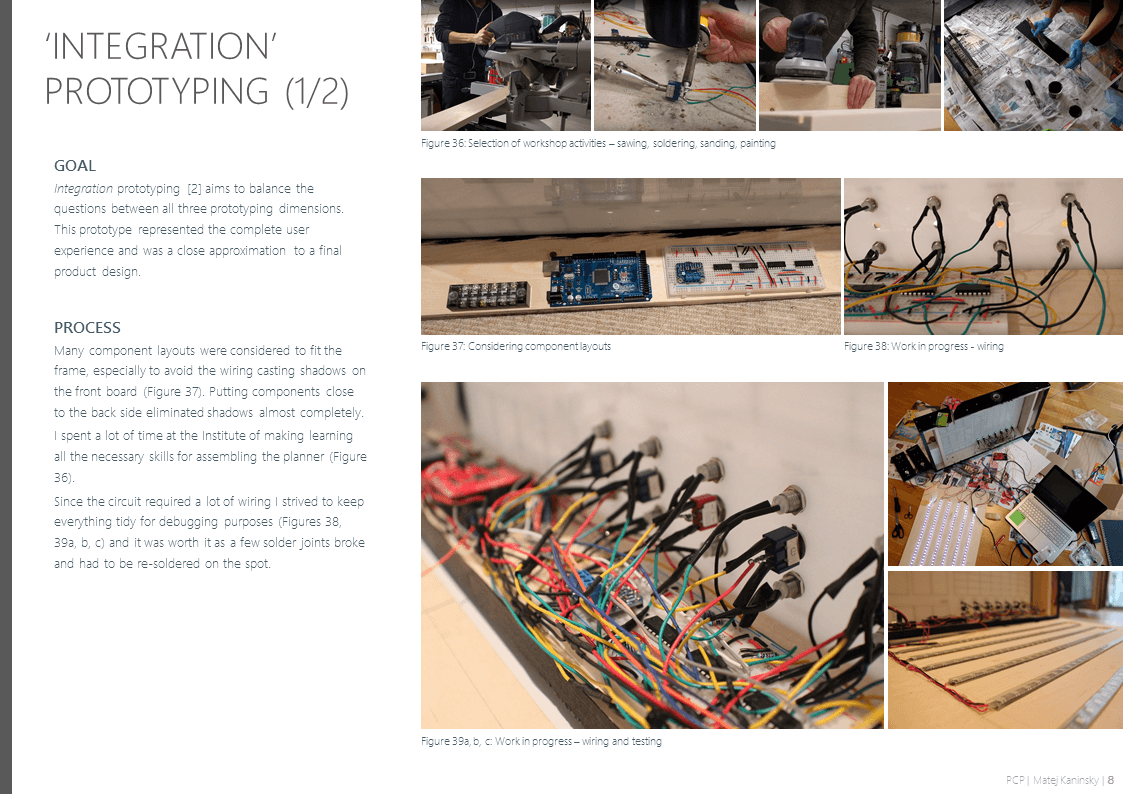
  • Workshop activities – soldering, sawing, sanding, painting

Solution

Weekley is a fully functional prototype that I now use on a daily basis.

How it works

Tasks can be written on colour-coded cards using a non-permanent marker and stuck on the board using re-stickable tabs. Weekley invites the user to reflect on their day by asking questions and giving audible advice when a switch is ticked to either ‘All done!” or ‘Almost’ position. The device is turned on and off by waving a hand in front of the distance sensor.

The user can adjust volume and brightness using two potentiometers. If all seven days are completed as ‘All done!’, Weekley rewards the user by playing a song and displaying a visual show.

Weekley - Finished prototype

Project video

Have a look at Weekley in action!

Project portfolio

If you are interested in a more detailed description of the process, the portfolio below shows the design and development at a more granular level.

Weekley Portfolio - Slide 1Weekley Portfolio - Slide 2Weekley Portfolio - Slide 3Weekley Portfolio - Slide 4Weekley Portfolio - Slide 5Weekley Portfolio - Slide 6Weekley Portfolio - Slide 7Weekley Portfolio - Slide 8Weekley Portfolio - Slide 9Weekley Portfolio - Slide 10

Feedback & Lessons learnt

First impressions of the prototype obtained from several dozens of people were positive. They praised the playfulness and the satisfaction of physically ticking the switches. Most people were not familiar with the role-based calendar and found it intriguing.

I made a resolution at the beginning of the project to challenge myself and to learn as much as possible in the given time frame. I spent a lot of long nights on the project and I think it was worth it. I had almost no experience with electronics and Arduino prior to this assignment and I now feel much more confident – knowing that I can pick up this knowledge relatively fast and put it in practice.

The most beneficial outcome of this project for me is an attitudinal change – I don't have to rely solely on commercial products when answering research and design questions but can design and build my own tools.